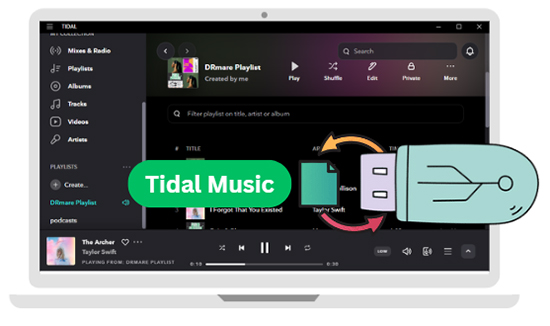
USB flash drives are compact, portable, and compatible with various devices, making them an excellent choice for carrying your favorite Tidal music wherever you go. However, downloading Tidal music to a USB drive isn't a straightforward process because Tidal music is encrypted and tied to its platform.
But with the right tool and method, you can transfer and save your favorite Tidal music to a USB drive. With it, you can listen to your Tidal playlists offline through USB on platforms like car stereos, home audio systems, and smart TVs without restrictions. This guide will walk you through how to download Tidal music to a USB in a few simple steps.
Part 1. Can You Download Tidal Music to USB
Tidal is a premier streaming platform offering over 110 million tracks, including high-fidelity and HiRes audio. While Tidal allows to download Tidal music through its mobile app for all Tidal premium subscribers, the downloaded tracks are encrypted cache files with unknown data. They cannot be transferred or played outside the Tidal app. This restriction ensures that users do not share or misuse the downloaded music.
Solution to Download Tidal Playlist to USB
To save Tidal music to a USB, you need to remove these restrictions and convert the tracks into standard audio formats compatible with USB drives, such as MP3, FLAC, or WAV. This requires a specialized tool, namely the DRmare Streaming Audio Recorder.
It is an efficient solution to download and convert Tidal music into local USB-compatible formats at a 37X faster conversion rate. It ensures original audio quality (HiFi and HiRes quality) is preserved and offers customization options to suit your preferences. It guarantees a good listening experience of Tidal songs on your devices via the USB stick.
Part 2. How to Download Tidal Music to USB
First of all, you should use DRmare Streaming Audio Recorder to download and convert Tidal songs, playlists, and albums to common audio files supported by a USB flash drive. Follow the steps below:
- Step 1Adjust the output format of Tidal music for USB
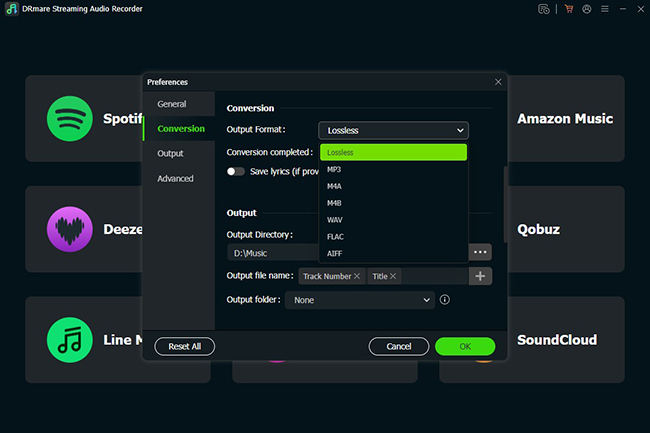
Download and install DRmare Streaming Audio Recorder on your computer. Depending on your purposes, you can choose a supported format you want for transferring Tidal music to USB. Open the settings window by clicking the menu > Preferences > Conversion in DRmare Streaming Audio Recorder. Choose a compatible format such as MP3 or FLAC for your USB drive.
- Step 2Import Tidal music to DRmare Streaming Audio Recorder
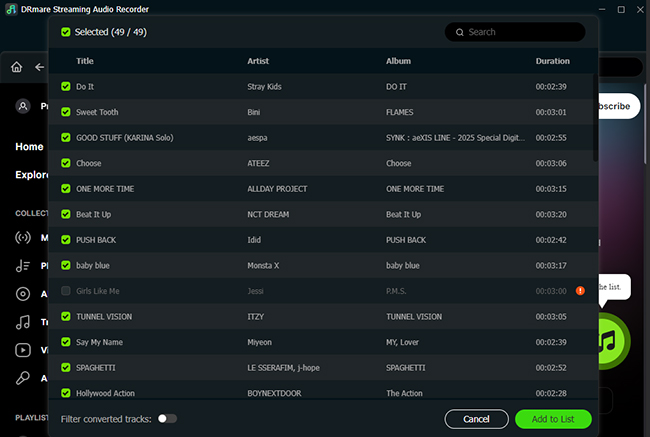
After the settings, you can click the Tidal icon to launch the integrated Tidal Web Player. Log in to your Tidal account to access your library and find your favorite Tidal playlist. Click + > Add to List button to add Tidal songs to the conversion queue.
- Step 3Convert Tidal to USB-compatible files
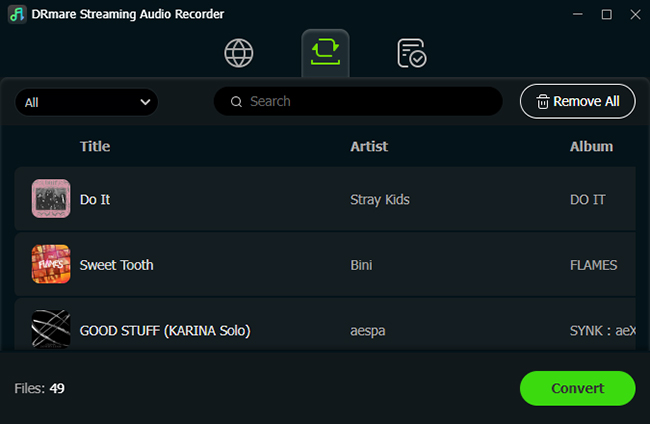
Now click the 'Convert' button, DRmare Streaming Audio Recorder will start downloading Tidal music to your computer in the selected format. Once completed, you can locate them on your computer by clicking the 'Converted' > 'Folder' icon.
- Step 4Save Tidal Music to USB Flash Drive
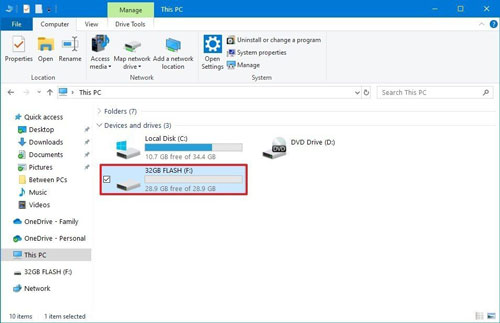
- Insert your USB flash drive into your computer. You will see it on the computer Windows Explorer or Mac Finder.
- Double-click the icon of the USB flash drive to open it. Create a new folder on the USB drive for better organization.
- Locate the converted Tidal audio on your computer. Copy and paste them into the USB folder. After transferring the files, safely eject the USB to avoid data loss.
Tips:
You can also connect your USB flash drive to your computer in advance and customize the output folder as your USB in DRmare Streaming Audio Recorder to download music to the USB drive from Tidal directly.
Part 3. FAQs about Downloading Tidal Music to USB
Why Transfer Tidal Music to a USB Drive?
Here are some advantages of downloading music to a USB flash stick:
- Portability: Carry your favorite playlists anywhere and play them on any USB-enabled device.
- Offline Listening: Listen to Tidal music offline without internet access or a Tidal subscription.
- Backup: Create a secure backup of your favorite tracks.
- Data-Saving: Avoid excessive data usage by using offline USB tracks.
- Device Compatibility: USB drives are compatible with diverse platforms like cars, TVs, and audio systems.
Can All Metadata of Tidal Music Be Retained in USB?
Yes, with the help of DRmare Streaming Audio Recorder, all essential metadata, including album art, artist names, track titles, and more, is preserved during the conversion process. Once transferred to a USB flash drive, this metadata remains intact, making it easier to organize your music collection and enjoy a seamless browsing experience on compatible devices.
Part 4. The Verdict
Downloading Tidal music to a USB flash drive unlocks greater freedom in how and where you enjoy your favorite tunes. While Tidal's native app restricts such usage, tools like DRmare Streaming Audio Recorder simplify the process, ensuring high-quality playback across all your devices. Follow this guide to enhance your music experience by taking your Tidal playlists offline and on the go.


User Comments
Leave a Comment