
Please kindly note that the free trial version of DRmare Apple Music Converter is limited to convert the first 30 seconds of each song only. To unlock the program and get the full features, you should purchase DRmare Apple Music Converter and get it activated with a valid license. To buy the license of DRmare, you can simply click the "Buy Now" button in the navigation menu or make the payment within the app itself. Once you complete the purchase, you can find the license of your DRmare Apple Music Converter from the mail address you've entered during the payment process.
But if you haven't downloaded the DRmare Apple Music Converter yet, please simply choose the proper version according to your computer system via the buttons below. And then install the program on your PC before getting to the next step.
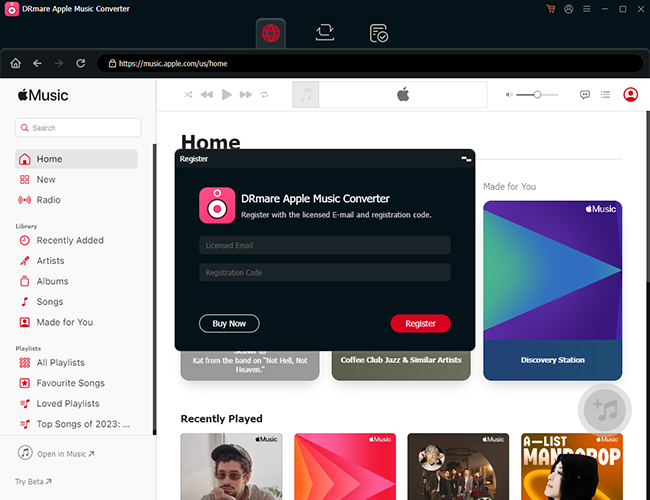
Firstly, launch DRmare Audio Converter on your computer, then click the "Register" icon or navigate to the top-right menu bar, hit the "menu" icon, and choose "Register". In the registration window, input your mail address to "Licensed E-Mail" box. Next, go to your mail box and copy the license code of DRmare Apple Music Converter, then paste it to the "Registration Code" box of the register window. Please don't leave any space before or after the code in case it won't be registered successfully.
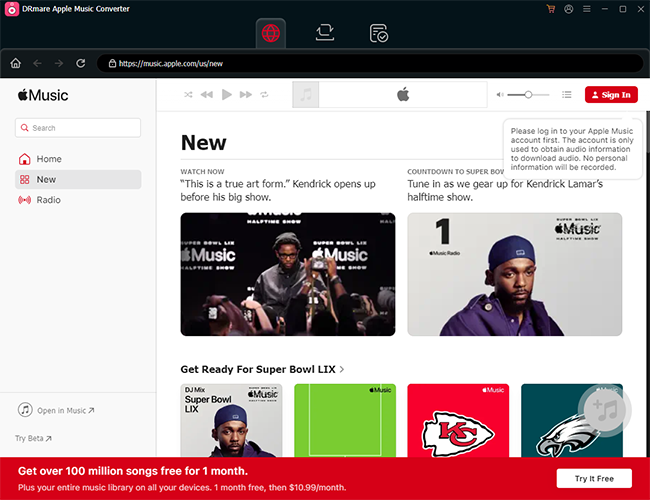
Upon opening DRmare Apple Music Converter on your macOS or Windows, you'll get the main window of this software with a built-in Apple Music Web Player shown as below. Click the "Sign In" button to log into your Apple Account so as to access your music library.
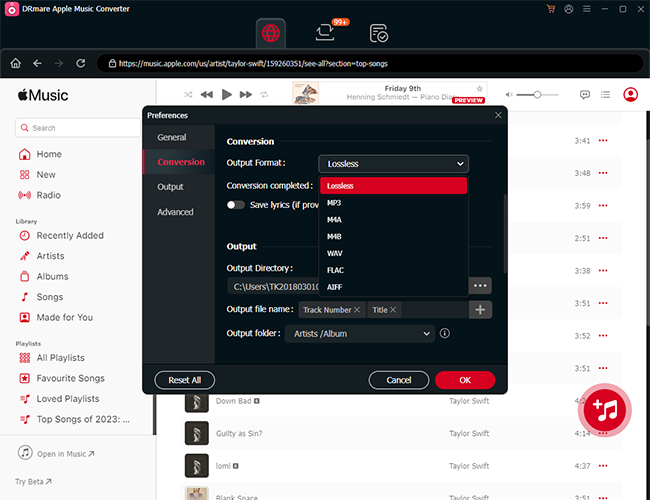
DRmare Apple Music Converter provides flexible options for you to customize the outputting audios to fit your requirements better. You can easily set the output audio codec, file format, sample rate, bit rate, audio channel and more as you desire. All these features are accessible via the "Menu" icon > "Perferences" option at the top right of DRmare Apple Music Converter. Furthermore, you can customize the type of output file name, output folder, and output directory. Moreover, you can rename each audio by moving the mouse to a specific song and clicking the "rewrite" icon.
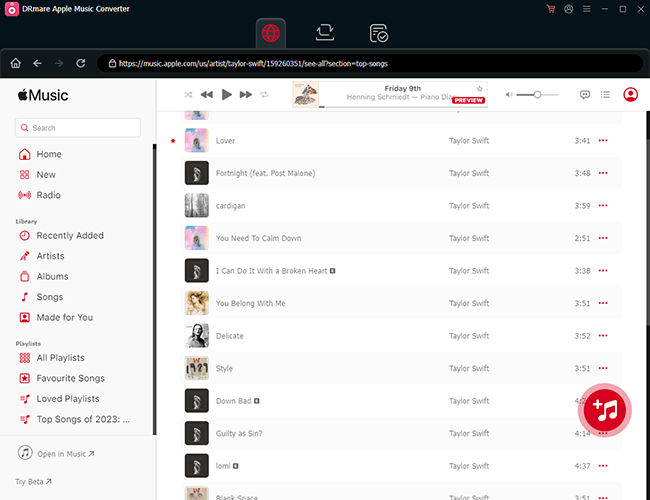
Now go back to the Apple Music Web Player in DRmare Apple Music Converter, and find the favorite songs that you'd like to download. Once found, open the item and you will see the grey "+" button become red. Tap it to load all Apple Music songs at once.
Another way to import Apple Music songs to DRmare Apple Music Converter is using the copy-n-paste option. Specifically, you should firstly get a link to Apple Music track from anywhere. When you copied Apple Music link, DRmare Apple Music Converter will autoamtically detect it. You can click the "Download" button to load them.

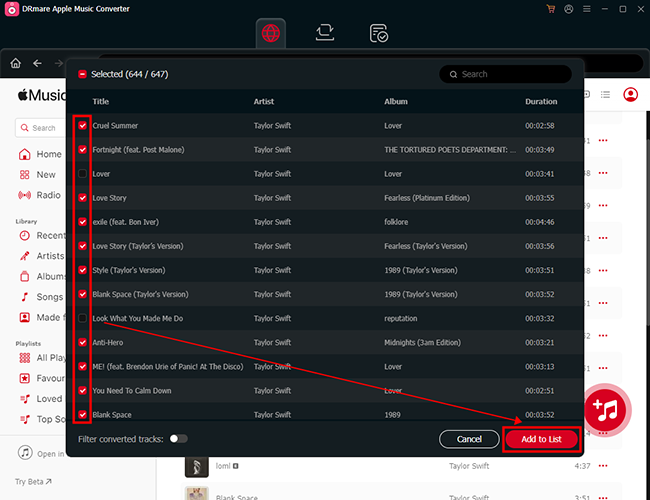
Now, you can choose certain Apple Music songs or the entire playlists or albums to add. After confirmation, tap the "Add to List" button to add them to the Convert window. As DRmare Apple Music Converter supports batch conversion, you can add as many songs at once or repeat this process as you like.
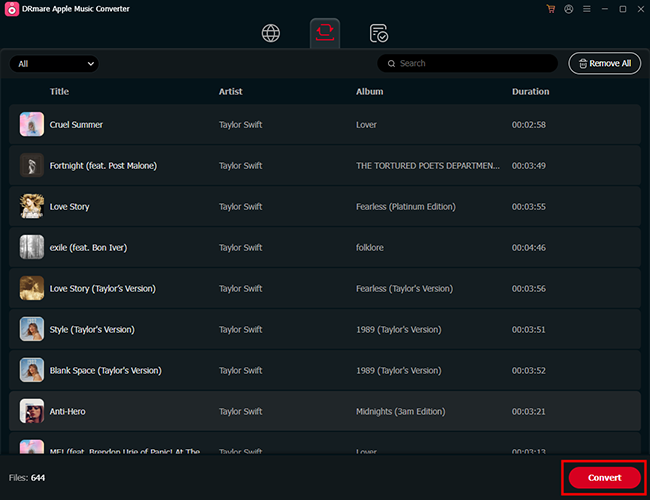
Now click the "Convert" button and DRmare Apple Music Converter will instantly convert your Apple Music songs or iTunes audios to MP3, FLAC, AIFF, WAV, M4A or any format you want. During the conversion process, you can also choose to remove some unwanted songs by click the "Remove" icon if you change your mind.
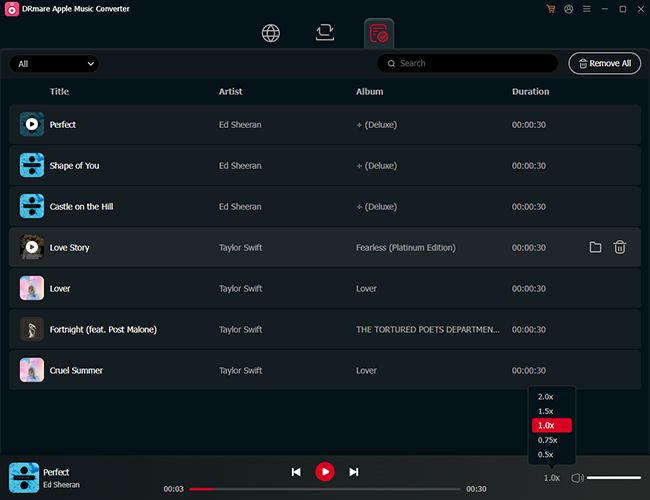
Once the conversion completes, you can find the converted unprotected Apple Music songs or other audios by clicking the "Converted" section. You can directly play them through its built-in music player in DRmare Apple Music Converter and it supports changing playback speed from 0.5x to 2.0x. Or, you can tap the "Open Folder" icon to locate them on your computer and transfer them to other devices for offline playback.
You can refer to this video tutorial for more details in using DRmare Apple Music Converter to convert Apple Music or any other audio files:


