Begin by downloading and installing the free trial version of DRmare Streaming Audio Recorder for your macOS or Windows system. Click the appropriate "Download" button below for your operating system, then double-click the setup file to install the software.
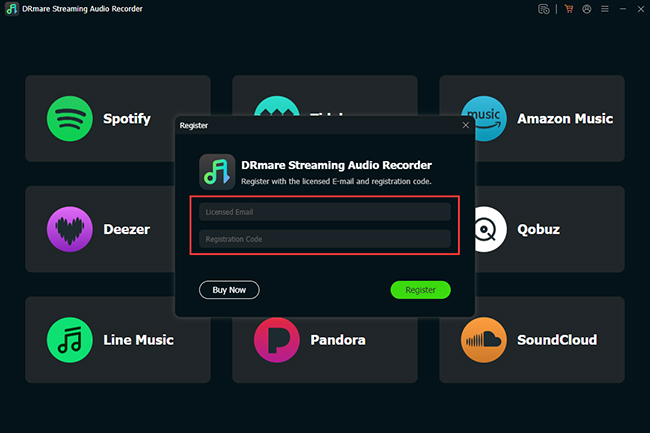
Since the trial version only converts the first 30 seconds of each song, we recommend purchasing a license to unlock full functionality. After payment, you'll receive a license key via email. To register:
Tips: Avoid adding any spaces when entering your license information to prevent registration failure.
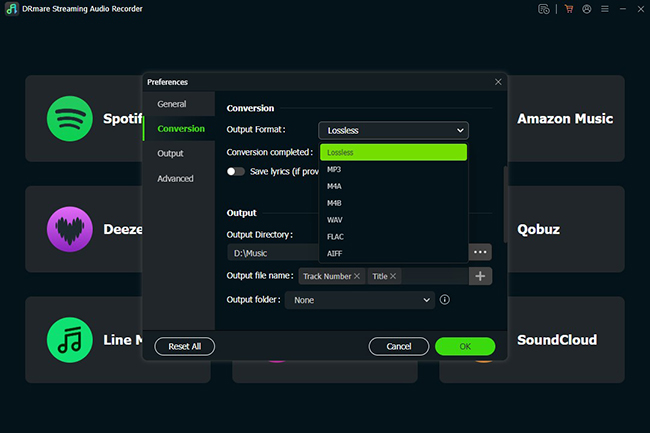
Before selecting a streaming platform, first configure your output settings. Click the "menu" icon in the top-right corner (Windows PC), or the "DRmare Streaming Audio Recorder" option from Apple menu bar (Mac) and select "Preferences".
Under the conversion settings, choose your desired output format (lossless audio, MP3, M4A, M4B, WAV, FLAC, or AIFF), and customize audio parameters like channel, sample rate, bit rate, and bit depth depending on your chosen format.
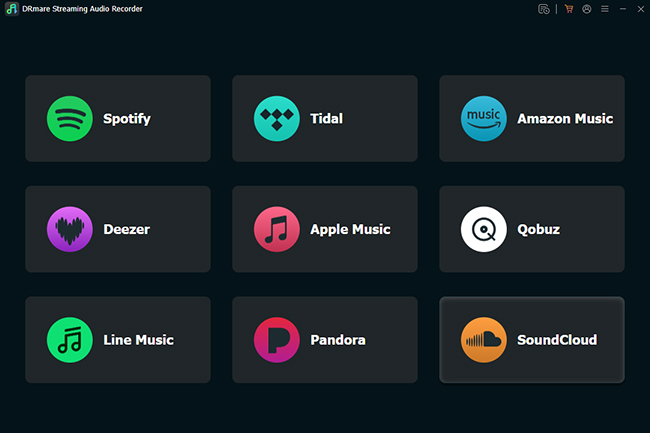
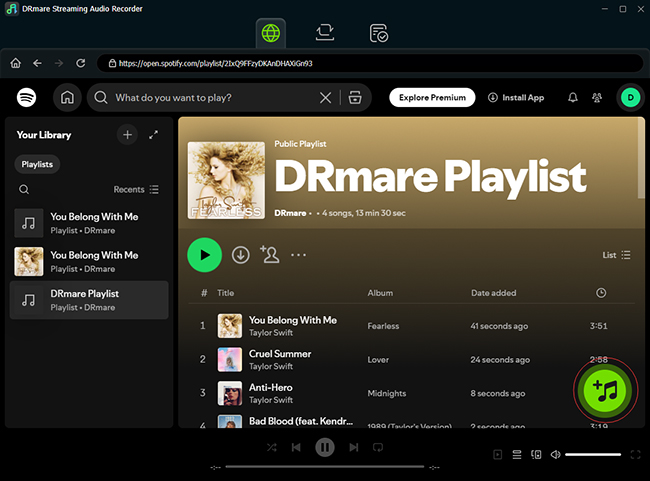
Choose a streaming music platform from the supported services (Spotify, Apple Music, YouTube Music, Amazon Music, Tidal, Deezer, LINE Music, Qobuz, Pandora, or SoundCloud). Then log into your account directly within the built-in browser of the software.
Open the playlist, album, or single track you want to convert. Click the "Add" button to select the tracks you want to download. Click the "Add to List" button to add them to the conversion list.
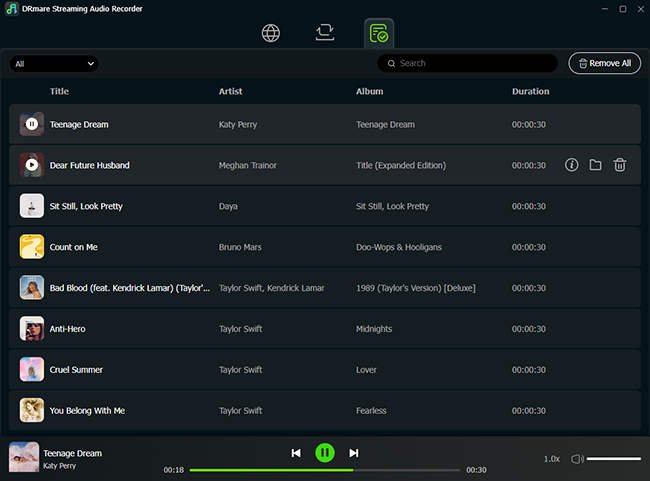
Once you've added all the tracks you want to download, click the "Convert" button under the "Converting" tab. The software will automatically download and convert your selected tracks to your chosen audio format and save them as your local computer.

After conversion completes, find your converted tracks listed under the "Converted" tab. You can open the output folder to access the local files. Since these files are now stored offline on your computer, you can freely transfer and play them on any device, anytime you want.
Master your music collection with this comprehensive video walkthrough. Learn how to use DRmare Streaming Audio Recorder to download and convert any track into MP3 and other high-fidelity formats, step by step.


