


YouTube is one of the most popular video and music streaming services on the Internet. Millions of people log into YouTube to view their favorite content such as tracks, albums, playlists, music videos, live performances and more. When you listen to music on YouTube every day, you may want to save the music on some storage device such as a CD. When you burn YouTube Music to a CD, you can create a physical copy of the music that can be played in standard CD players, car stereos, and other CD-compatible devices. This way, you can enjoy your favorite music from YouTube even if you are not connected to the Internet. In this article, we will discuss how to burn music to a CD from YouTube.
View also: How to Burn Spotify Music to CD
Part 1. Best YouTube to CD Converter
You cannot burn YouTube music to CD directly because YouTube music is protected and encrypted. You may not copy or move it to any unauthorized device. But don't worry, the best YouTube to CD converter - DRmare Audio Capture is here.
This is an amazing tool that you can use to download and unprotect YouTube music so that you can use YouTube music anywhere. It saves YouTube music locally on your computer so you can listen to it offline. It also preserves all ID3 tags for the highest possible quality. It can convert YouTube music to MP3, AAC, FLAC or other common formats and allows burning to CD. Even better, it also supports downloading music from other services.
- Grab lots of audio tracks at the same time with ease
- Record music from YouTube, Spotify, and more resources
- Convert YouTube Music in MP3 and other formats with high quality
- Can be used on other devices and players for offline playing
Here is a quick step-by-step guide on how to convert YouTube to audio CD free using DRmare Audio Capture.
- Step 1Install and Launch the DRmare Audio Capture
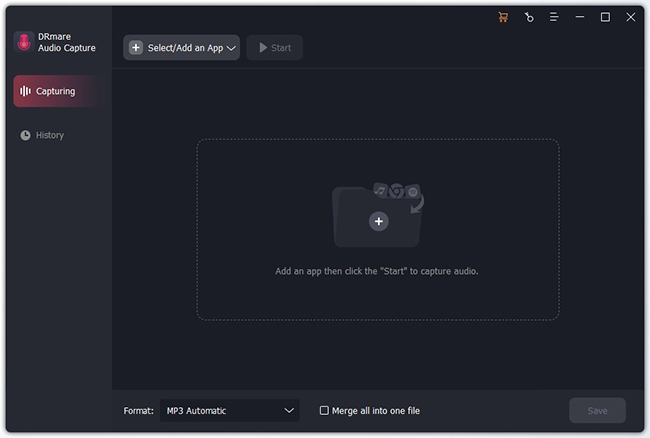
- The first step of this process should be downloading and installing the DRmare Audio Capture. Once you are done with that, double click on the DRmare Audio Capture to launch the app. Now on the main interface, you will see a selection of preset apps that you can record from. You can also add your own desired apps by clicking on the 'plus' icon.
- Step 2Change the format and other parameters
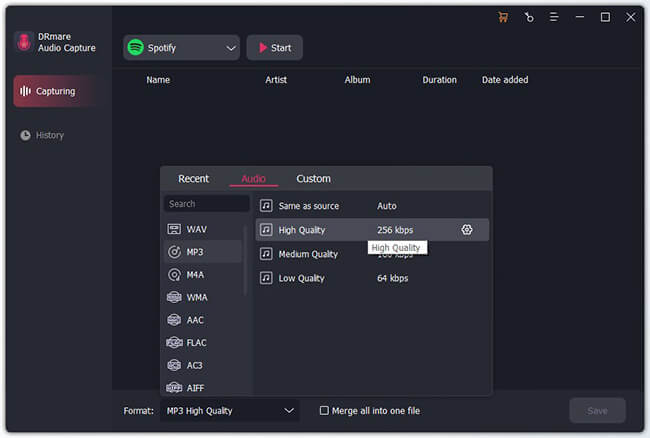
- DRmare Audio Capture supports multiple formats like MP3, M4A, FLAC, and many more. You can choose your desired format by going to the format settings. Click on the 'format' icon in the bottom corner of the main interface. And then select the desired format from the given options. You can also change other parameters like codec, bitrate, sample rate, and channel. This allows you to get a more personalized and premium experience.
- Step 3Capture and convert YouTube Music
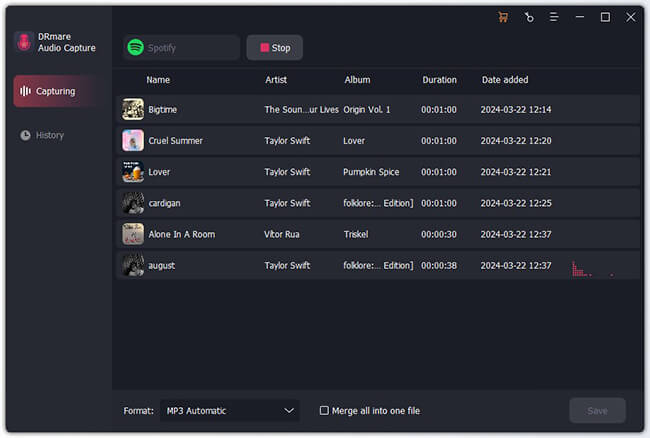
- Now that you are satisfied with all the desired settings, we can start the recording. Now open your desired browser through the main interface to open YouTube's web player. Or click the YouTube music icon. Then search for the desired music on YouTube. Simply start playing the music, and it will automatically start recording the music. DRmare Audio Capture supports multiple track recordings at a single time, which means you can open multiple browsers and record multiple audio files at once.
- Step 4Edit the audio if you want
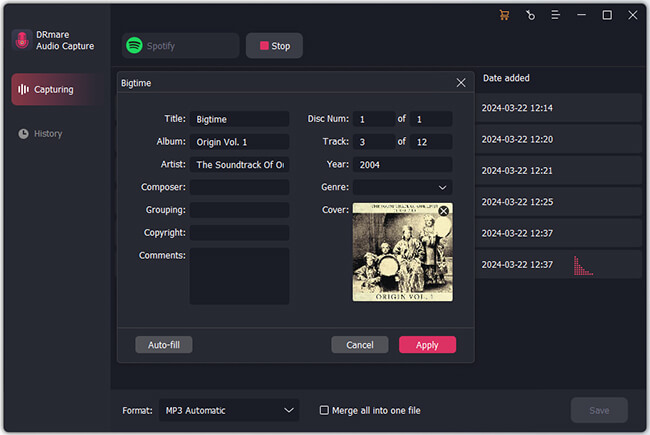
- Once you are done recording the desired music from YouTube, you can also trim, cut, or edit it by using the built-in editor. To edit the music file, move the cursor over the music, and then select the 'edit' option. You can either trim, cut or rearrange the audio files according to your desire.
- Step 5Save YouTube music locally
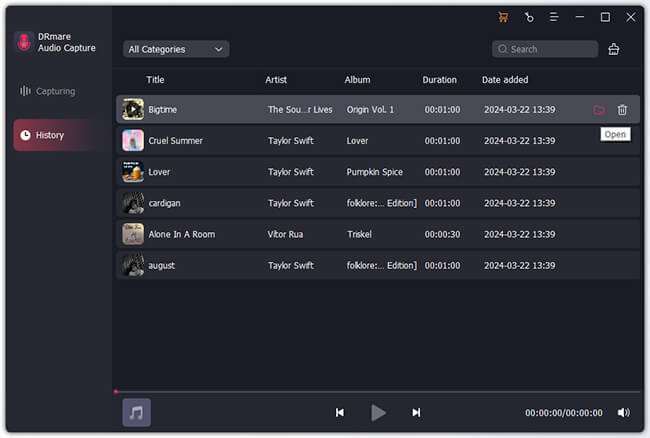
- Now that you are done with recording the music files. You can save the music by clicking on the "Save" button on the bottom corner of the main interface. It will be stored inside your computer's storage. Through the app, you can locate the recorded files by going to 'history'. You can also search for your desired music by clicking on the 'search' icon. Until now, you are ready to burn YouTube music to CD.
Part 2. How to Burn a CD from YouTube by iTunes
Now you've saved YouTube music locally on your computer by using the DRmare Audio Capture. You can easily burn it to CD or move to any other device for listening. Here we will show you how to burn music to a CD from YouTube with iTunes.
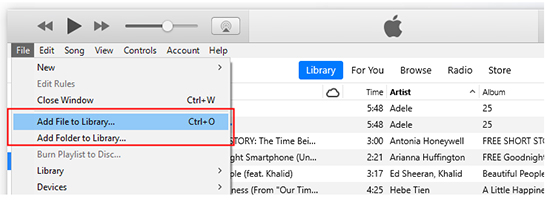
Step 1: Launch iTunes by double-clicking on the iTunes icon on your computer. Then click on "File" > "Add File to Library" to add the converted YouTube music files to your iTunes library. (You can also directly drag and drop the YouTube music files to iTunes.)
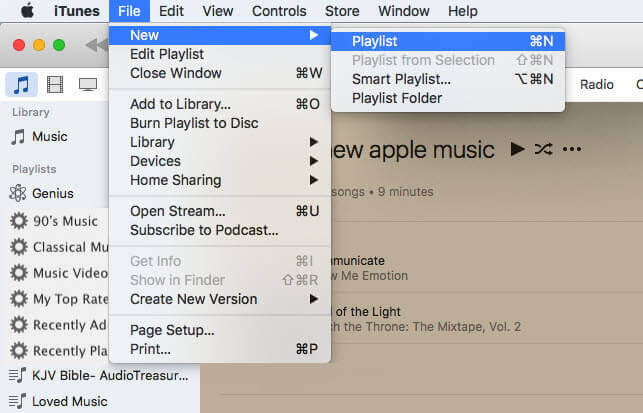
Step 2: Now, make a playlist to save a collection of music inside that playlist. To make a playlist, click on the "File" button, then click on the "New" button and then lastly click on the "Playlist" button.
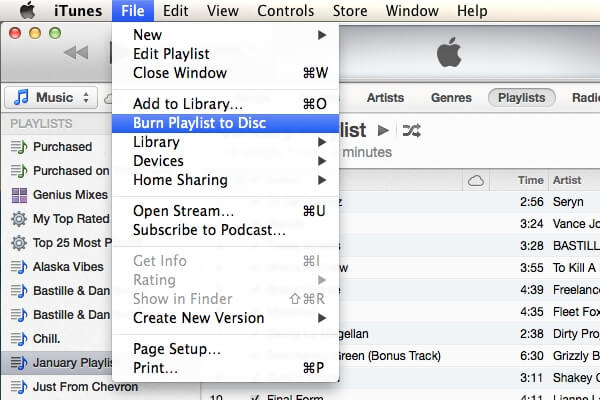
Step 3: After you are done making the playlist, insert the CD into the disc drive on your computer. Then come back to iTunes and right-click on the playlist you create and choose the "Burn Playlist to Disc" option, and finally click on the "Press" button to start burning.
Part 3. How to Burn Music to a CD from YouTube by WMP
Windows Media Player (WMP) also allows you to create audio CDs from music files stored on your computer. Therefore, after downloading YouTube music to your computer, you can easily burn YouTube music to CD with WMP.
Step 1: Launch the Windows Media Player and insert the CD into the disc drive.
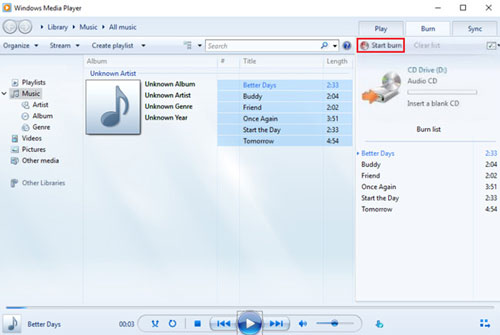
Step 2: Click on the "Burn" button on the top right. Then use the 'drag and drop' action to import YouTube Music to Windows Media Player burn list.

Step 3: After you are satisfied with your playlist, click on the "Start Burn" button on the top of the burn menu.
Part 4. How to Burn YouTube Music to CD by VLC
VLC (VideoLAN Client) is a popular and versatile media player that is capable of playing a wide range of audio and video formats. It is available on Windows, macOS, Linux, Android, and iOS. It also has a built-in feature that allows you to create audio CDs from music files. Now let's see how to burn a CD from YouTube by using VLC.
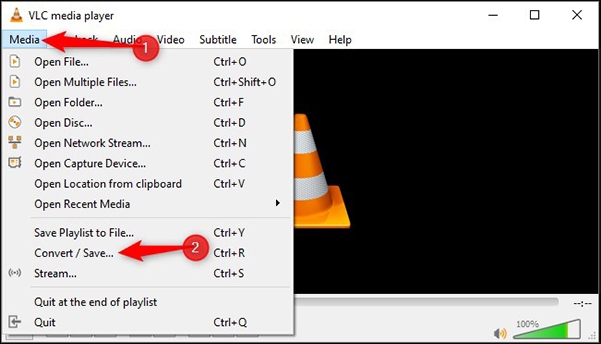
Step 1: Open VLC and click "Media > Convert/Save" and choose "Disc".
Step 2: Insert a CD into your computer.
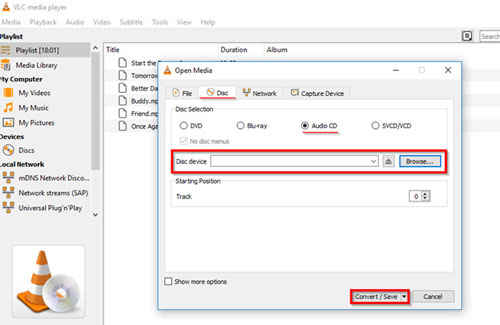
Step 3: Click "Audio CD" > "Browse" and select the CD and click "Convert/Save".
Step 4: Click "Tool" and you can adjust the format and other parameters. Then click "Browse" to choose your converted YouTube music files.
Step 5: Click "Start" to burn YouTube Music to CD.
Part 5. In Conclusion
In this article, you learned how to burn CD from YouTube in three methods. It is worth mentioning that you need to unprotect YouTube Music before burning it to CD. DRmare Audio Capture lets you do just that. It can convert YouTube to audio CD free, so you can easily burn YouTube music to CD or move to any device. It retains the original sound quality and meta tags so you can enjoy lossless yutube music.


User Comments
Leave a Comment