


Ever discovered a perfect playlist, listened to a captivating live podcast, or wanted to save the audio from a video and wished you could keep it forever? The desire to save streaming audio for offline listening is universal. However, it's not always as simple as hitting a "download" button. You often face technical hurdles, potential quality loss, and the hassle of manually tagging messy, unnamed files.
Don't worry, you're in the right place. This guide will walk you through the best methods for recording any streaming audio, from push-button simple solutions to powerfully free software. Whether you're a music aficionado or just need to save an important lecture, we have the perfect tool for you.
Part 1. The Easiest Method: A Dedicated Recorder for Music Services
For those whose primary goal is to build a high-quality personal music library from services like Spotify, Apple Music, or Tidal, a standard recorder won't cut it. You need a specialized tool that does more than just capture sound in real time—it needs to understand the music.
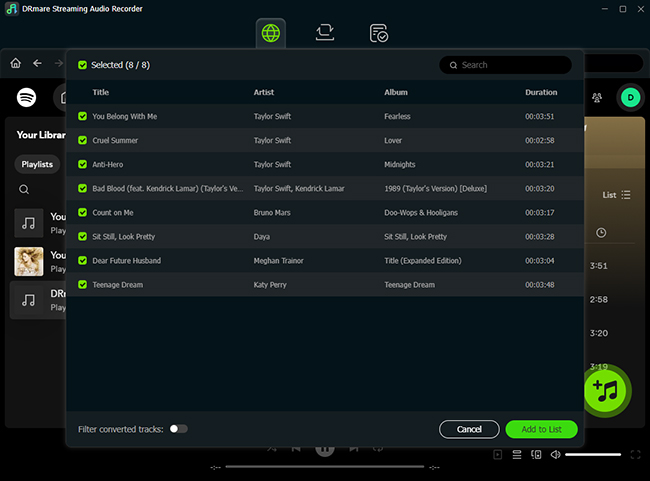
This is where a dedicated tool like the DRmare Streaming Audio Recorder shines. Instead of just recording, it functions as a high-speed converter, directly accessing the audio stream to download tracks. This approach solves all the common frustrations at once.
- ✅Lossless Quality: It preserves the original audio fidelity, so your music sounds exactly as the artist intended.
- ✅Automatic ID3 Tagging: The software automatically captures and embeds all the crucial metadata, including the cover art, artist, album, and track title. No more "Track 01.mp3"!
- ✅Batch Conversion: You can convert entire playlists or albums with a single click, saving you countless hours.
If your goal is to build a perfectly organized, high-quality personal music library without the technical fuss, a dedicated tool like this is the most efficient path. It's built specifically for the job.
Part 2. The All-Purpose Solution: Recording Any Sound from Your Computer
What if you want to record audio that isn't from a major music service? Perhaps it's a live DJ set on YouTube, a panel discussion from a website, or in-game audio. For these situations, you need a flexible tool that can capture any sound your computer makes.
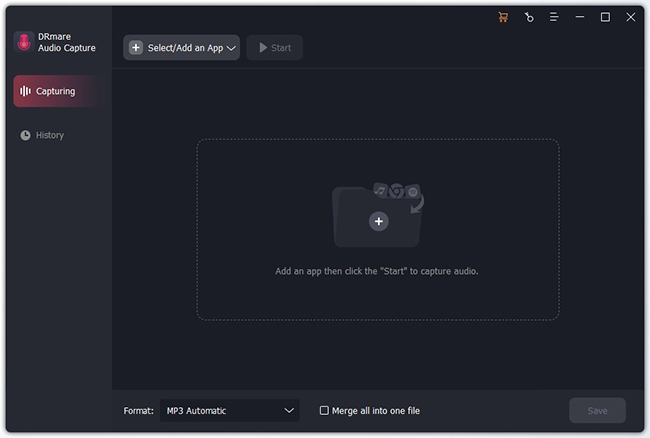
The DRmare Audio Capture is an excellent premium solution for this. It's designed to be a user-friendly, all-purpose recorder. It can record sound from multiple applications simultaneously, automatically split tracks based on silence, and save them in high-quality formats, making it a powerful yet simple alternative to more complex free software.
Part 3. The Best Free Streaming Audio Recorders
If you're on a budget or enjoy having more control over the recording process, free software is the way to go. These tools are incredibly powerful, but they often require a bit of initial setup to work correctly.
Audacity
Audacity is a legendary open-source audio tool. While it's a full-featured editor, it's also a fantastic streaming audio recorder—once you configure it properly. The setup process is different for Windows and macOS.
How to Record Computer Audio on Windows (WASAPI)
Windows has a built-in system that lets Audacity directly "listen" to your computer's audio output.
Step 1. In Audacity, find the Audio Host dropdown menu (it's usually set to MME). Change this to Windows WASAPI.
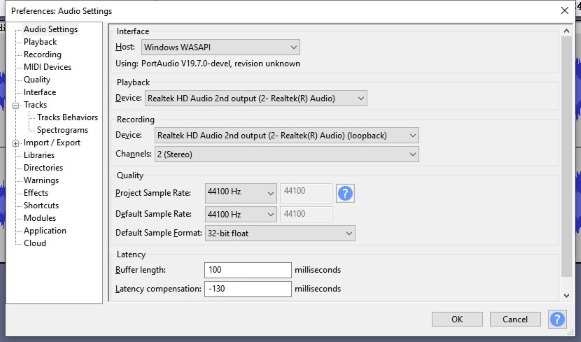
Step 2. In the Recording Device dropdown next to it, select your output device, followed by "(loopback)". This might look like Speakers (Realtek Audio) (loopback) or Headphones (NVIDIA High Definition Audio) (loopback).
Step 3. Press the red Record button. Play any audio on your PC, and you will see the waveforms appear in Audacity.
How to Record Computer Audio on Mac (BlackHole)
By default, macOS doesn't allow applications to record system audio. You'll need a free virtual audio driver called BlackHole to create a workaround.
Step 1. Download and install BlackHole.
Step 2. Open the "Audio MIDI Setup" application on your Mac. Click the + icon in the bottom-left corner and select "Create Multi-Output Device".
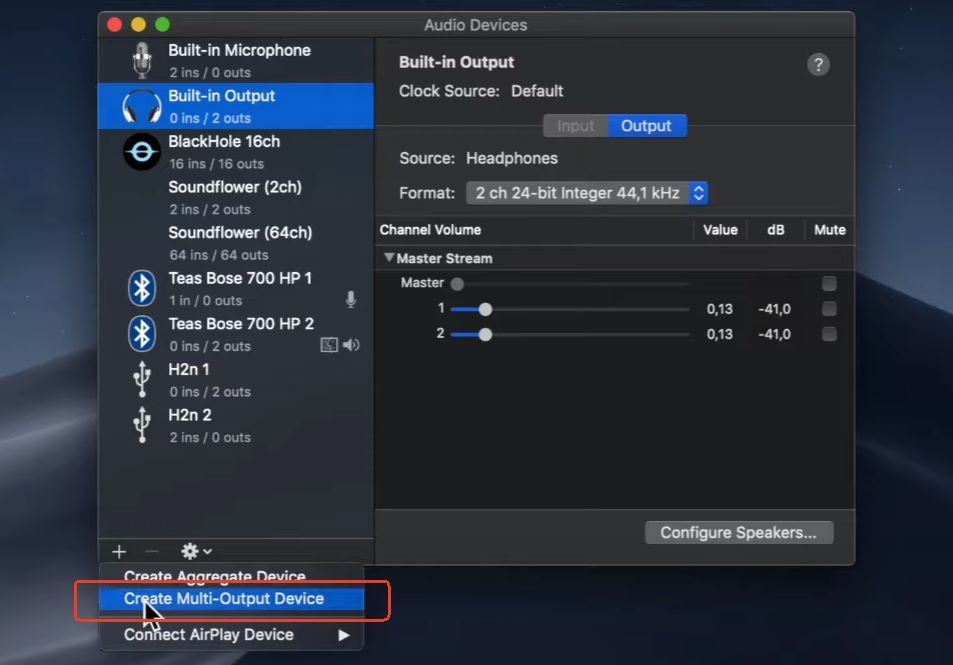
Step 3. In the new Multi-Output Device, check the boxes for both your regular output (e.g., "MacBook Pro Speakers") and "BlackHole".
Step 4. In your Mac's System Settings > Sound, set your Output to the "Multi-Output Device" you just created.
Step 5. In Audacity, set your Recording Device to "BlackHole". Now, when you play audio, it will go to both your speakers and Audacity for recording.
OBS Studio
OBS Studio is best known as a free tool for live streaming and video recording, but it has a secret weapon for audio: the ability to capture sound from a single application. This is perfect for recording a song from your browser without capturing system notifications or other sounds.
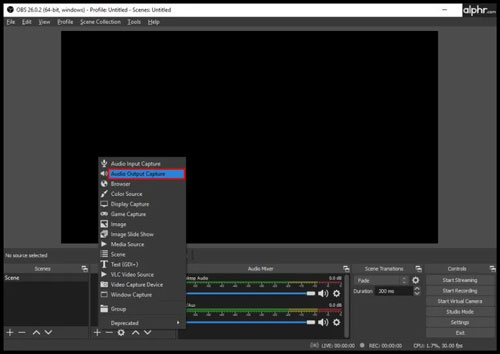
Step 1. In the main OBS window, find the "Sources" panel and click the + icon.
Step 2. Select "Application Audio Capture".
Step 3. In the properties window that appears, select the specific application you want to record from the dropdown menu (e.g., chrome.exe, spotify.exe).
Step 4. Go to File > Settings > Output. Change the Output Mode to "Advanced". Go to the "Recording" tab, set the Type to "Custom Output (FFmpeg)", and choose an audio-only format like MP3 or FLAC.
Step 5. Click "Start Recording" in the main window to capture audio only from your chosen app.
Part 4. A Quick Alternative: Browser Extensions
For quick, in-the-moment tasks, a browser extension is the most convenient tool available. These lightweight add-ons install directly into your web browser, allowing you to record audio from any open tab with a single click. There's no need to open a separate application.
This makes them perfect for simple jobs, like saving a short audio clip from a video or capturing a brief segment of a live event. However, this convenience comes with trade-offs. Extensions typically offer limited control over audio quality and format and are less reliable for long recordings. They are also strictly limited to capturing audio from within the browser and cannot record desktop applications.
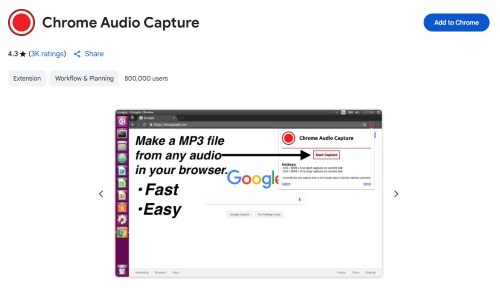
A popular option is Chrome Audio Capture. Think of these extensions as a digital notepad for audio—perfect for quick jobs, but you'll want dedicated software for anything requiring high quality and reliability.
Part 5. Conclusion
Finding the best streaming audio recorder is about choosing the right tool for your specific goal.
- For the easiest, highest-quality results, especially with music services, a dedicated tool like DRmare Streaming Audio Recorder is your best choice.
- If you prefer a free, powerful solution and are comfortable with a brief setup, Audacity and OBS Studio offer unparalleled control.
Pick the tool that best fits your needs and start building your personal audio library.


User Comments
Leave a Comment