


Making the switch from Spotify to Apple Music is an exciting step, opening up a world of high-fidelity audio and seamless integration for Apple users. But the thought of leaving behind years of carefully curated playlists can be daunting. If you're wondering how to transfer Spotify playlists to Apple Music, rest assured that the process is easier than you think.
This guide will walk you through everything you need to migrate Spotify to Apple Music, from simple and free methods for smaller collections to a more advanced approach for creating a permanent, future-proof backup of your music.
Part 1. Use a Spotify to Apple Music Playlist Converter
For a quick and straightforward transfer, a dedicated Spotify to Apple Music playlist converter is your best option. These services, often available as web-based tools or mobile apps, are designed to match the songs in your Spotify library and add them to Apple Music automatically.
There are several popular choices for this task:
- Web-Based Tools: Services like Soundiiz and TuneMyMusic are accessible from any computer and are great for users on all platforms.
- Mobile Apps: For iPhone users, SongShift is a well-known spotify to apple music app that handles the process directly on your device.
For detailed steps to use these tools, you can refer to this article:
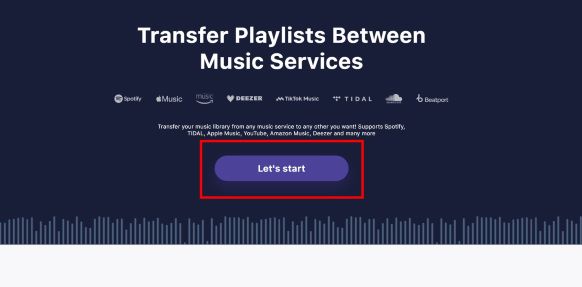
Here's we take TuneMyMusic as an example:
Step 1. Navigate to the website of TuneMyMusic, click on the "Let's start" button.
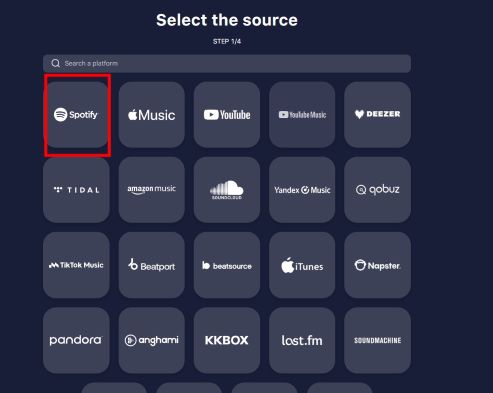
Step 2. Select Spotify as your source platform and log in to your account to grant the service access.
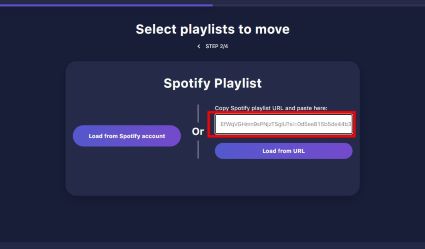
Step 3. Copy and paste the link of specific playlists you wish to transfer from your Spotify account into the input bar.
Step 4. Select Apple Music as your destination platform. You will be prompted to log in with your Apple ID to authorize the connection.
Step 5. Begin the transfer. You can watch as the service matches your tracks and builds the new playlists in your Apple Music account.
Many users hope to transfer Spotify to Apple Music free, and these services are the best way to do that. However, be aware that free tiers have limitations, typically allowing you to transfer a maximum of 200-500 songs.
Part 2. Migrating Your Full Library from Spotify to Apple Music
If your music library consists of thousands of songs, dozens of playlists, and years of "Liked Songs", a free converter won't be sufficient. The most cost-effective solution for a complete migration is what's known as the "one-month trick".
This strategy involves signing up for a single month of a premium plan on a service like Soundiiz or TuneMyMusic. For a small fee, you unlock the ability to transfer your entire library—all playlists, albums, and liked songs—in a single batch.
This approach offers the best balance of convenience and cost for the majority of users. Once the transfer is complete, you can simply cancel the subscription, having spent only a few dollars to flawlessly move your entire collection.
Part 3. Alternative Method: Convert and Import Your Spotify Playlists
If you want to ensure you never lose access to your music, there's a more powerful approach than simply transferring it. You can first download your library to create a permanent, offline archive that you truly own.
This is where a tool like DRmare Spotify Music Converter comes in. This software lets you convert Spotify playlists into standard, DRM-free audio files like MP3 or high-quality AAC. These files can then be imported directly into Apple Music or any other music player you choose in the future.
How to Archive and Import Your Music
The process involves two main steps: converting your Spotify library and then import the downloaded Spotify music into your Apple Music Library.
- Step 1Download and Convert Your Spotify Library
After installing DRmare Spotify Music Converter on your Mac or Windows PC, you can drag and drop playlists directly from the Spotify app into the DRmare interface. The software will download and convert the tracks into your chosen format, preserving all the important metadata like song titles, artists, and album art.
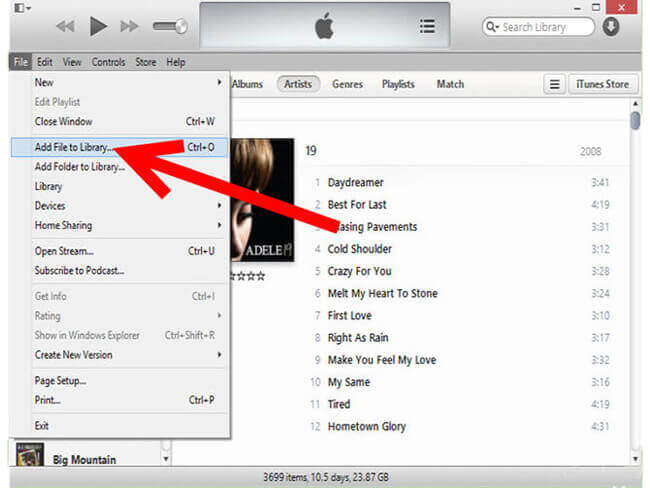
- Step 1 Import Your Local Files into Apple Music.
After conversion, open iTunes on your PC and click on 'File' > 'Add File to Library' and choose the converted Spotify files. In order to upload the converted Spotify songs to iCloud Music Library, you can click the '...' icon and then choose the menu 'Add to My Music'. When it is done, you can access them from the Apple Music app on your Android/Windows/iOS mobile devices.
Part 4. FAQs About Moving from Spotify to Apple Music
Is there a completely free app to switch from Spotify to Apple Music?
Yes, services like TuneMyMusic, Soundiiz, and SongShift all offer free tiers that work well for smaller libraries. However, these free plans have limitations, typically allowing you to transfer between 200 and 500 songs. For a full library transfer without limits, you will need to use a paid plan, though a single month's subscription is usually enough to get the job done.
How do I transfer my "Liked Songs" from Spotify to Apple Music?
Your collection of "Liked Songs" on Spotify is treated like a very large playlist. While most free transfer tiers focus on standard playlists, the premium versions of converter apps like Soundiiz and SongShift almost always include a feature to transfer your entire "Liked Songs" library and convert it into a playlist in Apple Music. The alternative method of using a tool like DRmare to archive your library will also inherently include all of your liked songs.
Will all of my songs transfer perfectly?
In most cases, yes, but occasional mismatches can occur. A song might not transfer if it's unavailable on Apple Music's catalog or if the service can't find an exact match (e.g., matching a remix instead of the original album version). It's always a good idea to quickly review your most important playlists after a transfer to ensure all the key tracks have moved over correctly.
Can I transfer my Spotify playlists to Apple Music on an Android device?
Absolutely. While some mobile apps like SongShift are iOS-only, web-based services are the perfect solution for Android users. You can use tools like TuneMyMusic and Soundiiz directly from the web browser on your Android phone or tablet to manage the entire transfer process without needing a computer.
How long does the transfer process take?
The duration depends entirely on the size of your music library and the method you choose. Using a third-party converter app to transfer a few hundred songs might only take 5-10 minutes. For a very large library with tens of thousands of songs, the process could take an hour or more. You will typically receive an email notification when the job is complete.
Part 5. Conclusion
Whether you chose the quick path of a playlist converter or took full ownership by creating a personal archive, your music has now found its new home. You can now enjoy the high-fidelity sound and deep ecosystem integration of Apple Music, complete with every one of the playlists and songs you've collected over the years. Happy listening!


Learn how to easily transfer your Spotify playlists to YouTube Music in 2024. This guide reviews the best free and paid tools, including TuneMyMusic, Soundiiz, FreeYourMusic, and an open script. Plus, find out how to handle missing songs with DRmare Spotify Music Converter.