


Don't worry. No matter if you want to record your own songs or download streaming music online from any sources, you just need to use audio recorders to help you. Depending on your computer systems Windows, Mac and different audio file types, the best audio recorder and recording method may vary. You can check the following detailed instruction to learn in details.

Part 1. How to Record Sound on Windows 10 for Free
Windows Voice Recorder
Although there are many apps can recorder audio online, the best one to record your own sound or songs from microphone on Windows 10 is the Windows Voice Recorder. It is an all in one tool which can record, edit and share audio easily.
What is more, it comes with Windows 10 by default, so you don't need to install it but go ahead to use it directly. Else if you have other versions of Windows systems like 8/7/Vista, you can click the go to the Microsoft Store to search Windows Voice Recorder and click "Get" button.
Step 1. Click "Start" button and search "Voice Recorder" and click it to open.
Step 2. Make sure your microphone is connected correctly.
Step 3. Now you can click "Record" button and you can start singing on the Microphone.
Step 4. During recording, you can click the "Flag" button to add a marketer. It won't interrupt the recording or click “Pause" to stop the recording without terminating the session.
Step 5. If your song is recorded completely, you can click "Stop" button to save the track.
Step 6. Now you can play the audio file. And you can trim, rename and share it just by clicking the related buttons.
Note: Please make sure you have enabled the option "Allow apps to access your microphone".
Audacity
Windows Voice Recorder is great for recording voice from Microphone but not from your speakers. This means the songs which are playing on your computer won't be recorded. Don't worry, in this case, you can try a free powerful tool called Audacity which can record audio from both your microphone and speakers on Windows by using the Windows Audio Session API (WASAPI).
It is a free and open-source digital audio recording software and editor which is available on Windows/Mac/Linux.
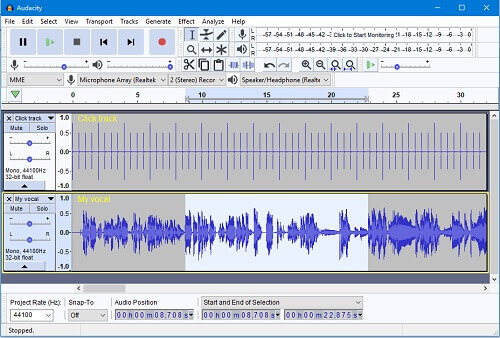
Step 1. Download and install Audacity from its official website.
Step 2. Open Audacity, choose the recording host "Windows WASPI" and then choose an appropriate loopback device such as speakers or headphones.
Step 3. Now you can play any music from your computer and click the "Record" button.
Step 4. When the recording is done, you can click the "Stop" button.
Step 5. You can now do some editing to the recorded file such as trimming out the unwanted files.
Step 6. Finally you can click "File" > "Export" >"Export as MP3" to save the song as MP3. You can also choose to export to other formats such as WAV, OGG.
Part 2. How to Record Music from Mac with QuickTime for Free
QuickTime Player
QuickTime Player is a bundled app that comes with Mac. It is a well-known player for playing iTunes M4V movies, Apple Music M4P files and so on. To your surprise, you may not know it is also a great screen recorder, audio recorder for Mac. Yet, it is very easy to use. Please just follow the steps to record audio from Mac by QuickTime player.

Step 1. Open QuickTime on your MacBook or iMac.
Step 2. Click the top "File" menu > "New Audio Recording", you will see the pop up audio recording panel.
Step 3. To change the record settings, please click the arrow icon next to the record button. To record voice from Microphone, please select the recording device as built-in microphone. Else if you want to record music, please choose the display audio or so. You can change the quality as High or Maximum too.
Step 4. Now you can play your music on your Mac and click the "record" button.
Step 5. When finished, you can press the same button to stop recording.
Step 6. You can click "File" menu >"Save" to save the recording.
Part 3. Best Way to Record Audio from Your Computer
With the free recording tools above, they do work to record audio from both your Windows and Mac computers. But honestly to say the recorded files are not perfect.
For most of the time, they are combined with some random noises. Yet, they takes real time to record songs one by one. I feel pretty tired after doing several recordings. Is there another better solution here?
The answer is yes. If you don't care spending a few dollars, you should definitely take a look at the best DRmare Audio Catpure for Windows/Mac. It is an well-designed tool which supports to record audio from computers automatically and smartly. The best part of it is that it supports lossless and simultaneous recording.

- Record any sound playing on your Chrome Browser automatically and smartly
- Trim and edit your audio to new formats M4A, M4B, AAC, WAV, FLAC, MP3
- Supports to record songs from any websites such as Spotify, Deezer, Pandora
- Besides Chrome, you can record songs from other browsers such as Firefox
DRmare Audio Capture is a terrific commercial tool for monitoring your browser voice activity and record the songs automatically, which will save your a lot of time. Are you curious how does it work exactly before buying? If so, you can try it out first. The trial version is free.
- Step 1Install and launch DRmare Audio Capture
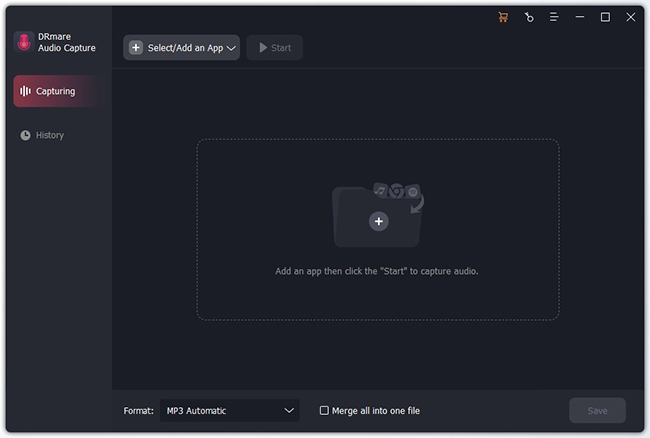
- After launching DRmare, you will see the main screen with a list of supported browsers and apps which are supported to record music from. Please make sure Chrome is on the list. If not, you can simply click "+" to add it.
- Step 2Customize output music format (optional)
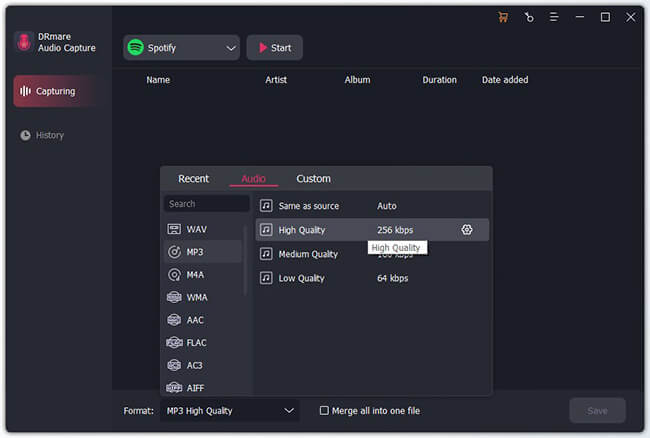
- You don't have to change this option generally. But if you do want to do that, you can go ahead to open the format settins window by clicking the icon from the bottom right. Here I will choose the original MP3 format.
- Step 3Play music on your computer
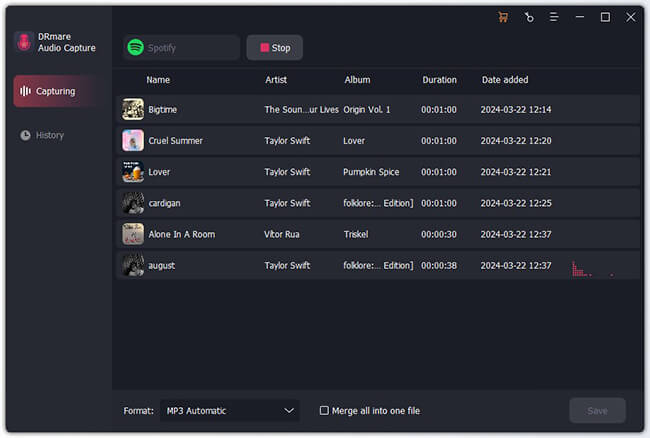
- Just click the "Chrome" icon from your DRmare and your can use it to play any songs from any websites, DRmare software will detect the music and reord it accordingly. What is better is that mutiple tabs are supported. You can play as many songs together as you want from the tabs and they won't be mixed. That is amazing, right?
- Step 4Edit new music (optional)
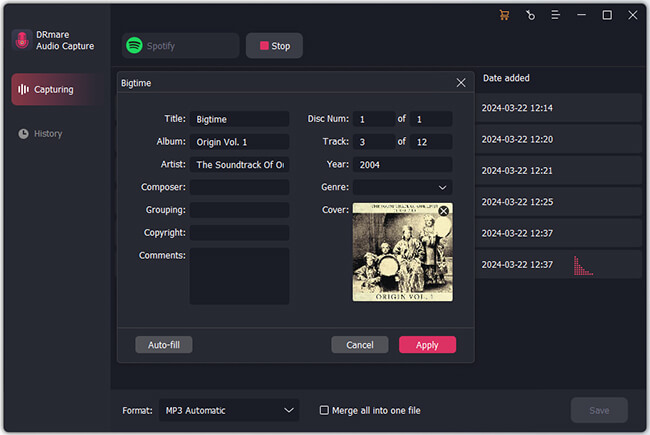
- You can trim your new audio to make it meet your requriement better. If you don't need to edit it, please just skip this step.
- Step 5Save the songs to your PC
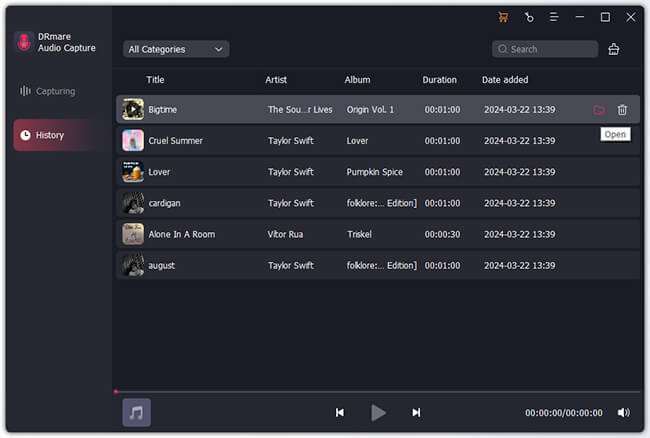
- Now you can click "Save" to save all the MP3 songs to your computer. To find them, just go to the default output folder. If you have no idea about it, you can click top "Help“ menu and choose "Preferences", then you can check the output path and change it if you like.
Overall
DRmare software contains all the features of free Chrome Auto Capture and with a lot of powerful automatic features. It makes it easiest to record music from browser. The small shortcoming is that you need to pay to get a full license.


User Comments
Leave a Comment