





Want to extract audio from iTunes M4V movies and save it as MP3, AAC, or another audio format? The right method depends on whether your video is DRM-free or protected by Apple's FairPlay technology. Standard tools such as FFmpeg and VLC can extract audio from compatible, unprotected M4V files, but they cannot be relied on to process protected iTunes movie downloads.
Here is what I learned after testing various free tools and dedicated iTunes audio extractors, along with practical steps on how you can extract clean audio from your M4V videos without losing your mind.

Understand iTunes M4V Audio Tracks and the DRM Divide
An M4V file is essentially an MP4 video container developed by Apple. When you inspect the internal structure of a standard movie purchased or downloaded through iTunes or the Apple TV app, the video stream is usually paired with one or more specific audio codecs:
- AAC (Advanced Audio Coding): Typically a 2-channel stereo track sampled at 48kHz with a bitrate around 160 kbps to 256 kbps, designed for broad compatibility across mobile devices and headphones.
- AC-3 or E-AC-3 (Dolby Digital / Dolby Digital Plus): A 5.1 surround sound stream (often 384 kbps to 640 kbps) meant for home theater setups.
Note:
Exporting M4V movie audio into uncompressed formats like WAV or FLAC can't preserve lossless quality. From an audio engineering standpoint, that approach usually wastes disk space. Because the source audio inside an M4V movie is already compressed in a lossy format like AAC or AC-3, transcoding it into WAV will not restore lost frequencies. It just bloats a 120 MB audio stream into a 1.2 GB file.
Keeping the original .m4a (AAC) or .ac3 stream intact is the cleanest way to avoid generational quality loss.
How to Check if Your M4V File Has FairPlay DRM
You can determine whether your video is encrypted in less than a minute without installing extra software. Right-click the .m4v file on your computer and open Get Info (on macOS) or Properties -> Details (on Windows). Look closely at the file kind or media attribute description.
If the file is labeled as "Protected MPEG-4 video", it carries active FairPlay encryption tied to your Apple ID. If it simply reads "MPEG-4 video", the file is unencrypted, which is often the case for home videos, HandBrake encodes, or select older iTunes videos, meaning you can extract the audio stream directly in a few seconds.
Method 1. Extract Audio from DRM-Free M4V Movies Losslessly with FFmpeg or VLC
When working with an unprotected M4V file, re-encoding the audio into MP3 is rarely necessary unless you use an older MP3 player that rejects modern formats. Demuxing (copying the raw audio stream out of the video container without re-compressing it) preserves 100% of the source fidelity and finishes almost instantaneously.
During my test with a 2.1 GB unprotected 1080p M4V film, extracting the stereo audio track via stream copy took less than four seconds on an M2 MacBook Air. By comparison, re-encoding that same two-hour track into a 320 kbps MP3 in VLC took nearly three minutes and introduced a slight high-frequency roll-off.
Using FFmpeg for Bit-Perfect Audio Stream Extraction
FFmpeg is a free command-line tool that handles multi-track M4V containers with surgical precision, which is especially helpful when a movie contains multiple language dubs or a 5.1 surround track alongside the stereo mix. During my tests, what impressed me most about FFmpeg was its ability to pull out the exact audio track in milliseconds without re-encoding it, meaning zero quality loss.
Step 1. Open your terminal (Command Prompt on Windows or Terminal on macOS) and run ffmpeg -i input.m4v to inspect the internal streams. Look for lines labeled Audio:—commonly, Stream #0:1 is the stereo AAC track, while Stream #0:2 is the 5.1 AC-3 surround track.
Step 2. Run the following command to pull the first audio stream directly into an M4A container without re-encoding:

Step 3. If your M4V file only contains a 5.1 surround sound track and you want a balanced stereo MP3 for headphone listening, use this downmix command so dialogue does not sound quiet against loud action effects:
Pro Tips:
Simply renaming movie.m4v to movie.mp4 will not strip off DRM. It just changes the file label, the encryption inside remains untouched.
Here is a quick cheat sheet I put together based on different scenarios:
Using VLC Media Player for a Graphical Workflow
If you prefer not to touch the command line, VLC Media Player offers a built-in conversion utility on both Windows and Mac.
Step 1. Open VLC, navigate to Media -> Convert / Save (or File -> Convert / Stream on macOS), and add your .m4v video file.

Step 2. Select Audio - MP3 or create a custom profile where the Audio tab is set to Keep original audio track, which prevents VLC from re-compressing the stream.

Step 3. Choose your destination filename (making sure the extension matches .mp3 or .m4a accordingly) and click Start to run the extraction.
Method 2. Capture Audio from Protected iTunes M4V Movies via Digital Loopback
If your M4V movie was purchased or rented from the iTunes Store, FFmpeg and VLC will hit a wall because FairPlay blocks third-party software from reading the raw media streams. While some tutorials claim that recording audio ruins sound quality, that generally applies to analog recording or open-microphone capture. Modern operating systems support digital loopback recording, which taps directly into the digital PCM signal inside your system's audio mixer before it ever reaches your digital-to-analog converter.
In my testing, capturing a protected iTunes movie scene through Audacity's digital loopback produced a clean 48kHz/24-bit recording with zero background hiss and no noticeable dynamic range compression. The primary trade-off is time: because loopback recording captures playback in real time, extracting a five-minute musical cue takes five minutes, and a full movie requires letting the film play from start to finish.
Setting Up Lossless Loopback in Audacity
Audacity is free, open-source, and works across current versions of Windows 11 and modern macOS releases where many direct DRM decryption utilities struggle.
- On Windows: Audacity natively includes the Windows WASAPI host, which lets you capture system playback directly without installing virtual cables.
- On macOS: Because macOS restricts internal audio tapping by default, installing a lightweight, free virtual audio driver like BlackHole (2ch) allows you to route output from the Apple TV app straight into Audacity.
Step 1. Open Audacity and configure your audio host settings. On Windows, set the Audio Host to Windows WASAPI and choose your active speakers or headphones followed by (loopback) as the recording device. On Mac, select BlackHole 2ch as both your system sound output and your Audacity recording input.
Step 2. Set the project sample rate in the bottom-left corner of Audacity to 48000 Hz to match the native sample rate of iTunes M4V video streams, avoiding unnecessary sample rate conversion.
Step 3. Mute system notifications on your computer so unexpected email chimes do not get baked into your audio track, press Record in Audacity, and start playing the M4V movie in iTunes or the Apple TV app.
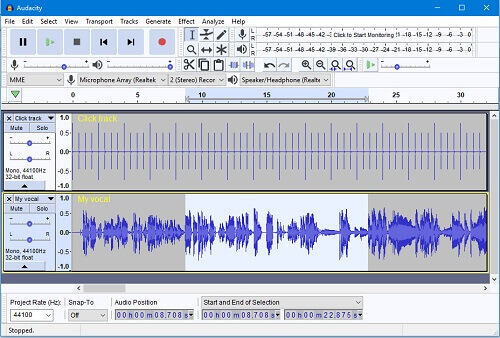
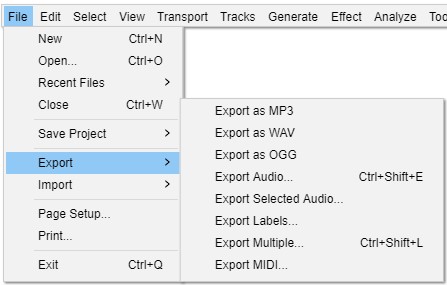
Step 4. Once the scene or movie finishes playing, click Stop, trim any leading silence at the start of the waveform, and go to File -> Export Audio to save the track as a high-bitrate MP3 (256–320 kbps) or AAC file.
Method 3. Converting Protected iTunes M4V Movies to MP3/M4A/Etc. with DRmare
When your goal is to batch-extract complete audio tracks from a dozen full-length iTunes movies at high speed, real-time loopback recording can feel tedious.
For iTunes Purchases and Rentals
Dedicated commercial converters, such as DRmare M4V Converter, are built specifically to strip FairPlay DRM and export the underlying audio tracks at accelerated speeds. However, these iTunes movie audio converters only work with purchased and rented videos. Also, during my compatibility checks on modern systems, I found that these converters generally require a Mac running an older macOS version (before macOS Catalina) to bypass encryption directly. Fortunately, DRmare is fully compatible with the latest iTunes app on a Windows computer.
Step 1. Authorize your iTunes account on the computer and verify that the downloaded .m4v movie plays normally inside iTunes before launching the converter.
Step 2. Open your chosen DRmare M4V Converter and click Add Files to browse your local iTunes library, or drag the .m4v file directly into the main workspace.
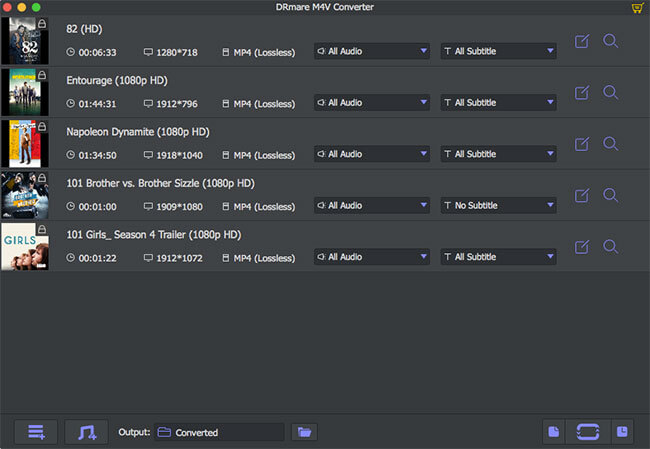
Step 3. Click the Format panel and choose AAC (M4A) if you want to retain the closest match to the original iTunes stream, or select MP3 at 256 kbps / 48kHz if you prioritize universal device compatibility.

Step 4. Select your target output folder and click the Convert button to strip the FairPlay wrapper and save the standalone audio file to your drive.
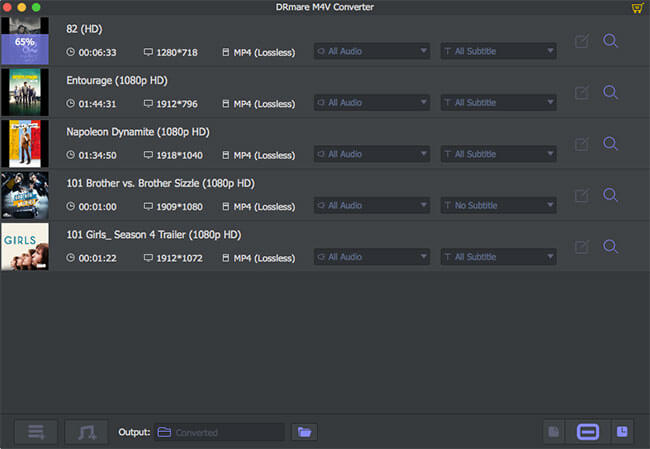
YouTube Tutorial: How to Extract Audio Tracks from iTunes M4V Movies
For Apple TV Streams
On newer macOS versions and modern systems, Apple has largely transitioned from iTunes to the dedicated Apple TV app for buying, renting, and streaming video content. Because stream delivery and encryption mechanisms differ between legacy iTunes downloads and modern Apple TV streams, traditional M4V converters won't recognize these new streams.
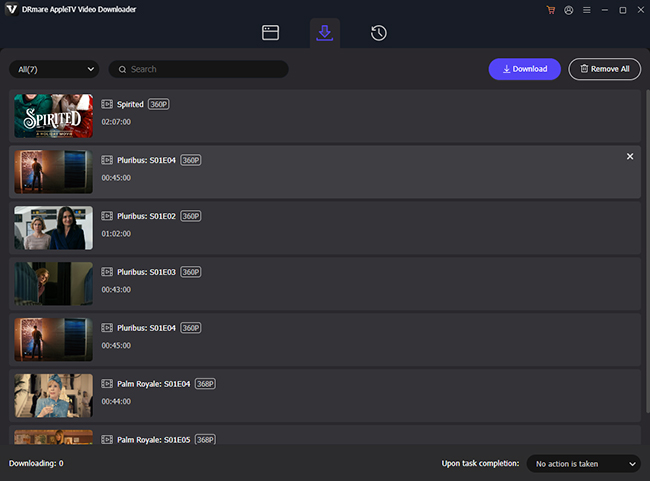
For this modern ecosystem, a stream downloader like DRmare Apple TV Downloader provides a seamless solution by grabbing video streams directly from Apple TV while keeping all associated high-quality audio tracks intact.
During my testing on a Windows setup and newer macOS environments, this downloader proved far more convenient than traditional loopback recording when capturing multi-channel audio from Apple TV content:
- Open DRmare Apple TV Downloader and log into your Apple Account using the built-in web player interface to access your Apple TV library or active subscription content.
- Search for the movie or show you want to process. Before initiating the download, open the audio configuration panel. Here, you can select specific audio tracks (such as multi-language commentary or original surround sound streams).
- Add the movie to the conversion queue and click Download. The software fetches the stream and extracts the embedded audio tracks in batch at accelerated speeds, saving them as standalone audio files on your local drive without quality loss.
Comparison: Which M4V Audio Extraction Method Fits Your Setup?
Choosing the most practical tool comes down to three variables: whether your file has DRM, which operating system you run, and whether you are grabbing a short soundtrack clip or archiving an entire library.
| Method / Tool | Best For | Audio Quality | Extraction Speed | OS & DRM Compatibility |
|---|---|---|---|---|
| FFmpeg / VLC (Stream Copy) | DRM-free M4V files & home video encodes | 100% Lossless (Bit-perfect original stream) | Near-instant (Under 5 seconds per movie) | Works on all Windows & macOS versions; Cannot process FairPlay DRM |
| Audacity (WASAPI / BlackHole) | Grabbing short soundtrack clips or single movies for free | Near-original (48kHz/24-bit digital PCM capture) | 1x Real-time playback speed | Works on latest Windows 11 & modern macOS; Bypasses DRM via playback capture |
| DRmare M4V Converter | Batch-extracting audio from downloaded iTunes purchases & rentals | High (Retains original AAC/AC-3 or converts to 256–320 kbps MP3) | Fast (Batch conversion at accelerated speeds) | Strips FairPlay DRM; Fully supports latest iTunes on Windows (Requires pre-Catalina on macOS) |
| DRmare Apple TV Downloader | Extracting multi-language/surround audio from Apple TV streams & libraries | Lossless stream preservation (Keeps original multi-channel tracks) | Fast (Direct batch stream downloading) | Built for modern macOS & Windows; works via built-in Apple TV web player without legacy iTunes |
Troubleshooting Common Issues When Extracting Audio from M4V Files
Even when the extraction process is completed without an error message, movie audio streams have a few quirks compared to standard music files. Here are a few quick fixes for issues I ran into while experimenting with M4V extraction:
-
The output file is completely silent: The movie might have multiple audio tracks (e.g., surround sound, commentary, secondary languages). In FFmpeg, run
ffmpeg -i input.m4vto inspect track IDs, then use themapflag to select the specific audio stream you want. -
The sound quality feels flat: If you converted an AAC audio stream into a low-bitrate MP3, you might hear compression artifacts. Use a higher quality preset like
q:a 2in FFmpeg. - The file won't open at all: Double-check if the file is completely downloaded and not still locked by Apple TV / iTunes encryption.
Summary
Extracting audio from M4V videos isn't complicated once you know what type of file you have. For DRM-free videos, FFmpeg gives you lightning-fast direct stream copies, while VLC provides a smooth graphical interface. For protected purchases and streams, standard media utilities won't cut it, and specialized recording/conversion utilities become necessary.
Focus on stream copying whenever possible to preserve original quality, and stick to MP3 or AAC for the best mix of audio fidelity and device compatibility!

 Home



User Comments
Leave a Comment