


For iTunes users, you may hesitate whether to buy iTunes movies or other contents again, because you don't know whether your family or close friends have bought them or not under their account before. Besides, sometimes we want to back up our previous iTunes purchases and rentals when we are going to switch an Apple ID. For these purposes, you might search the ways on Google on how to share movies on iTunes to other accounts?
As a result, there is no direct way to consolidate iTunes media files from different accounts to a new account. That is because they are FairPlay DRM protected. Luckily, there are plenty of workarounds. In this post, we will show some tips for you on how to share iTunes movies with family or friends as well as use iTunes movies directly on other devices.

Part 1. Share iTunes Movies to Other Accounts by iTunes Family Sharing
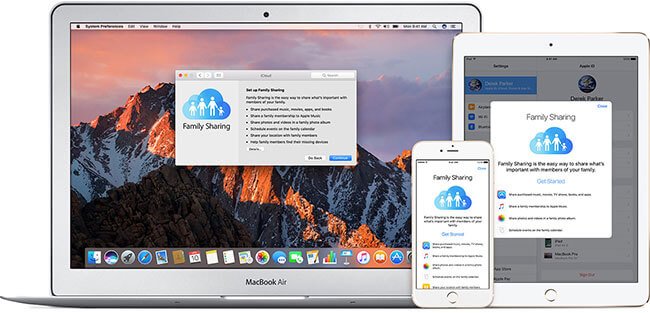
What is iTune Family Sharing
iTunes Family Sharing allows to share iTunes library files like movies, music, iBooks, audiobooks. You can share to 6 members with different iTunes accounts in your family and help you manage your kid's purchases. And other family members can view and download your iTunes and App Store purchases and so on. By using iTunes Family Sharing, you don't have to share your passwords with each other but you must use one credit card for all devices. Now let's see how to share iTunes movies with family as below.
How to Set Up iTunes Family Sharing
You can only be a part of one family at a time. To get started, you can create a family group. You can only do that on an iOS device with iOS 8 and later, or Mac with Yosemite and later.
1. Set Up iTunes Family Sharing on iPhone or iPad
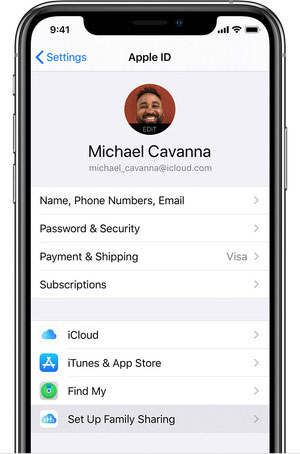
Step 1. Go to 'Settings' on your iPhone or iPad and click on your 'Apple ID' account at the top. (If you are on iOS 10.2 or earlier, go to 'Settings' > 'iCloud').
Step 2. Touch on 'Set Up Family Sharing' option.
Step 3. Review your account information under the 'Family Purchases'.
Step 4. Confirm the Apple ID that you'd like to share content from by entering your password.
Step 5. Ensure the 'Share my purchases' is on.
2. Set Up iTunes Family Sharing on Mac
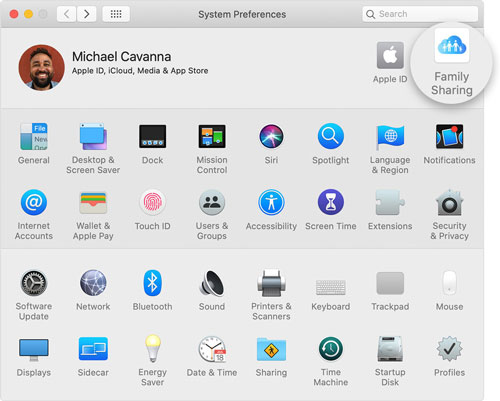
Step 1. Choose 'Apple' top menu to open 'System Preferences' window on your Mac system.
Step 2. Click 'Family Sharing' at the top right corner of the 'System Preferences' window. (If you are on macOS Mojave or ealier, go to 'Apple' menu > 'System Preferences' > 'iCloud').
Step 3. Confirm your Apple ID and start to invite family members.
Step 4. Make sure the 'Share my purchases' is chosen.
How to Add Family Members
On iPhone or iPad: Open 'Settings' and hit on your 'Apple ID' to choose 'Family Sharing'. Then touch on 'Add Family Member' and enter their name or email address.
On Mac: Open 'System Preferences' and hit on 'Family Sharing'. Please make sure Family is selected in the left and then choose 'Add Family Member'.
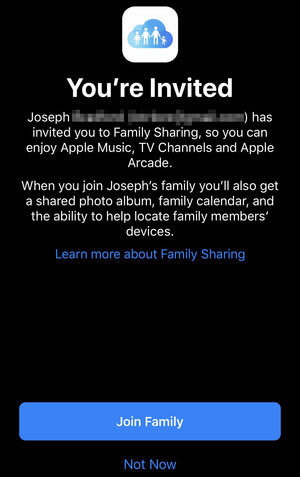
Note: All the family members you add will get an iMessage to invite them into the Family. And they need to click on it and choose to join before Family Sharing works for them.
How to View Shared iTunes Movies
When the Family Sharing is set up, all the people in the same family can access to each other's shared media files. Just go to the store that you want to download movies from and find the 'Purchased' tab.
To access the Media files like movies from your family on Mac, you can open iTunes > Click 'iTunes Store' > Navigate to 'Purchased' tab.
You will see a small downward triangle button besides the 'Purchased' menu, please click it to choose an account from your family. You will see the items under the account and choose the movie files you want to download.
Part 2. Share Movies on iTunes to Friends or Any Account Freely
Method 1. Share iTunes Movie with Friend via DRmare M4V Converter
With the iTunes Family Sharing, it is awesome to transfer iTunes movies to another account. But it is still not perfect, because it is limited to 6 people in a family. But can you share iTunes movies with friends? Actually, you can't as it doesn't offer the option to share iTunes media files to a specific account only.
So how to share iTunes movie with friend when you are in need of sharing a video to a close friend? It may not be so convenient to add a friend to a family group in iTunes. If you are bothered with this issue, it is time to solve it now.
There is another perfect way out there to remove DRM protection from iTunes videos by DRmare M4V Converter. By doing this, you can transfer the iTunes films to any accounts or devices. This DRM removal tool has the advantages to keep the original quality for any videos while removing DRM protection. And it supports to convert iTunes M4V to MP4 and other video formats for using on different devices. To find out how it works, you can simply have a try.
Detailed Guide to Remove DRM and Share iTunes Movies with Friends:
- Step 1Add iTunes movies to DRmare M4V Converter
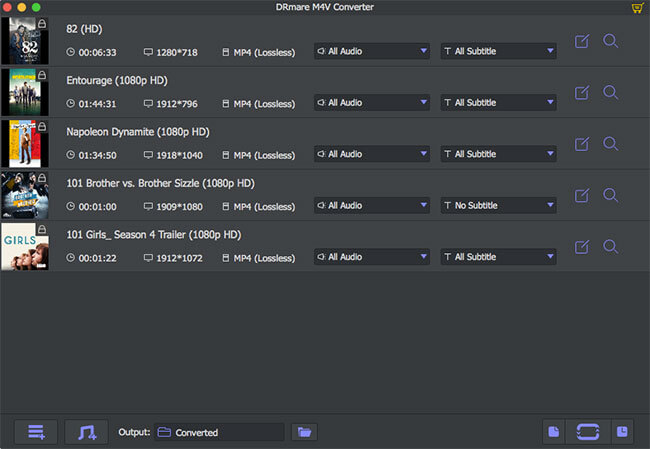
- Install and launch DRmare M4V Converter, you will see the main screen of it. Please navigate to the bottom side and click '+'. You will see a list of the downloaded episodes on your iTunes. And you can select the movie items you want to load to the software.
- Step 2Choose an output video format
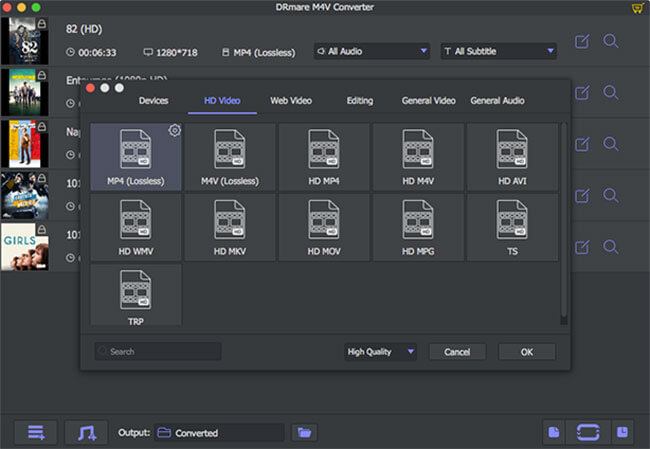
- You can choose any output profile you prefer. But if you just want to transfer it to another account to enjoy yourself or for a friend, it is better to choose MP4(Lossless) or M4V(Lossless). They will keep 100% video quality after converting.
- Step 3Remove DRM from iTunes M4V
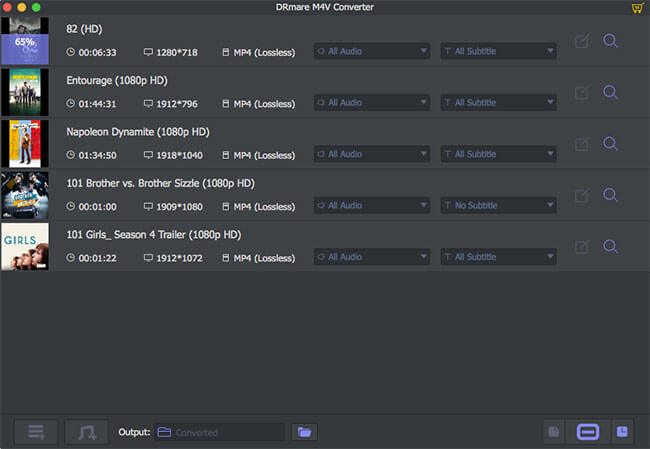
- Once everything is ready, you can click the conversion button from the lower right side. It will start to break the DRM in a fastest speed. When it is done, the iTunes videos will become common videos. And then you can get the way on how to share movies on iTunes with your friends without any annoyance.
Method 2. Share iTunes Movies with Friends by Movies Anywhere
Movies Anywhere launches a movie-sharing feature called 'Screen Pass'. It allows users to access their purchased movies from iTunes Vudu, etc. and loan out only three movies a month to family and friends. And the movies can be played across the Movies Anywhere platform. But there is a limited time to watch the movies, up to 14 days. And once the movie is begun, users need to finish watching in 72 hours.
Note: Only purchased movies can be downloaded and only U.S. resident can use this feature of Movies Anywhere.
Here let's check how it works.
Step 1. Open Movies Anywhere app and sign in.
Step 2. On the main screen, tap on your profile icon and hit on 'Manage Retailers'.
Step 3. Touch on 'iTunes'. Once iTunes or the iTunes Store app opened, finish the process.
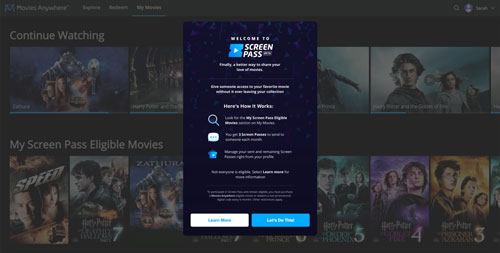
Step 4. Pick any purchased title from 'My Screen Pass Eligible Movies' section under 'My Movies' in the app.
Step 5. Click the 'Screen Pass' icon to share and offer the details. Then anyone can access to your selected movie.
Part 3. To Summarize
To transfer iTunes movies to another account is really important for many iTunes users.
If you want to share iTunes movies between your family, the iTunes Family Sharing feature will help you great.
If you want to share iTunes movie with friend, then you could give a try to Movies Anywhere. But it is time-limited and can only share three movies a month.
But if you want to share a specific file such as a video to your friends, it is better to use DRmare M4V Converter to remove DRM to share it rather than using Family Sharing. What's more, removing DRM is a great way to back up your iTunes videos and consolidate all of them together.


User Comments
Leave a Comment