


As one of the largest digital media stores in the world, iTunes is an excellent platform for purchasing and organizing movies, music, books, and more. Whether you want to review a purchase, check for a billing issue, redownload previous purchases, or simply reminisce over past digital content you've acquired, knowing how to find and see iTunes purchase history is essential.
If you're not familiar with the process of viewing your iTunes purchase history, you are in the right place. This guide will walk you through the steps to check your purchase history on iTunes on an iPhone, iPad, Mac, and Windows PC.
Part 1. How to Find and See iTunes Purchase History on iPhone/iPad
If you prefer to use your iPhone or iPad to purchase content from iTunes, viewing your purchase history on these devices is very easy. The steps below show how to find your iTunes purchase history on an iPhone or iPad. However, note that the purchase history displayed on iOS devices may be incomplete.
How to See iTunes Purchase History on iPhone/iPad (For Music)
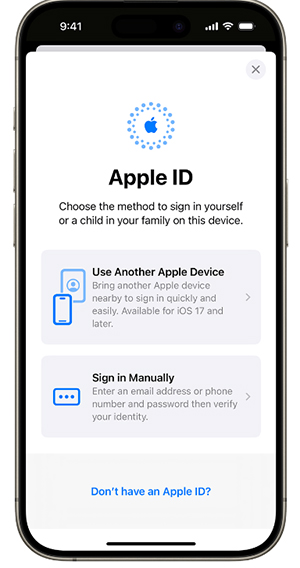
Step 1. Sign into your Apple ID account: Tap on the "Settings" icon on your home screen on your iPhone or iPad. Click "Sign in to your [device]" and "Sign in Manually" to enter your Apple ID and your password.
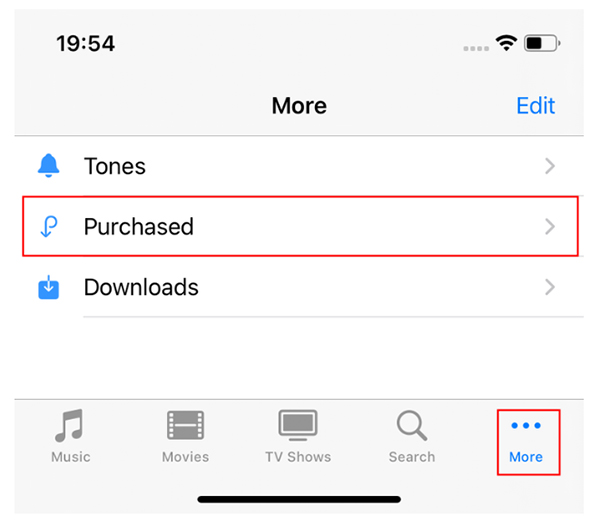
Step 2. Click Purchased Option in iTunes: Open your iTunes Store, tap "More" at the bottom-right corner of the screen, then select "Purchased" from the three available options.
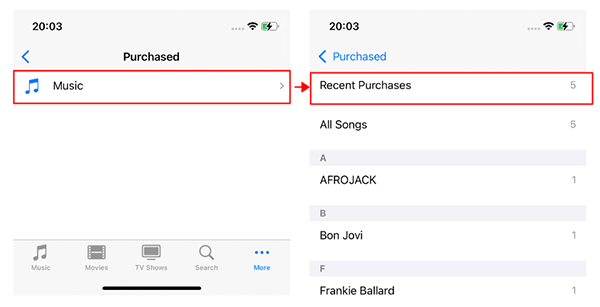
Step 3. View iTunes Purchase History: You can choose "Music" to view your recent music purchases. Select "Recent Purchases" to see the last 50 transactions.
How to Find iTunes Purchase History on iPhone/iPad (For Movies/TV Shows)
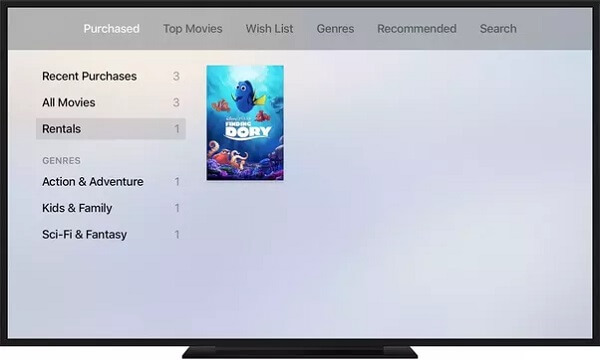
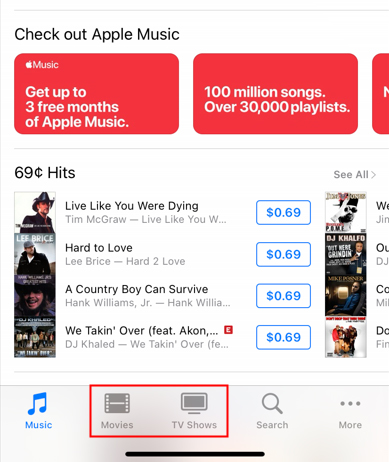
Step 1. Go to iTunes Movie/Shows Library: Launch the iTunes Store app on your iPhone or iPad. You can choose between "Movies," or "TV Shows" from the bottom options.
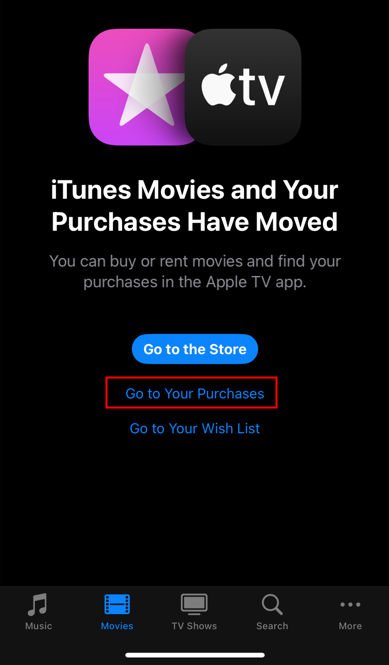
Step 2. Go to Your Purchases: You will note that iTunes Movies/TV Shows and your purchases have moved to the Apple TV app. You can click the "Go to Your Purchases" to navigate to the Apple TV library.
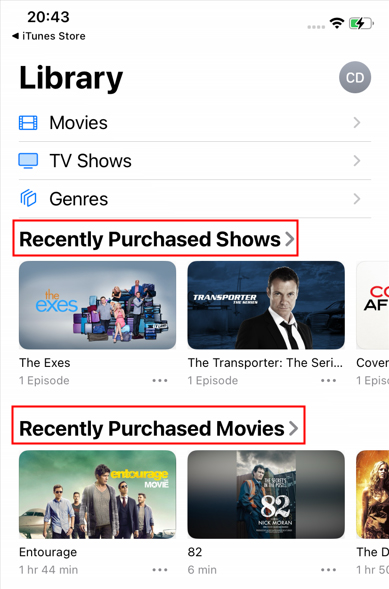
Step 3. View Purchased Videos on Apple TV: Select "Recently Purchased Shows" or "Recently Purchased Movies" option to view all video purchases on your iPhone or iPad.
Note:
1. You can directly open the Apple TV app on your iOS devices, and click the "Library" option to check all movie and TV show purchases.
2. Due to regional restrictions imposed by Apple, some users may be unable to view detailed purchase history in the iTunes Store. In this case, you can access your last 90 days of purchase history by visiting the official site at reportaproblem.apple.com.
Part 2. How to Check and View iTunes Purchase History on Mac/PC
On a computer, accessing your iTunes purchase history depends on the operating system you are using. If you're on macOS Catalina or later, the iTunes app has been replaced by the Apple Music app, Podcast app, and Apple TV app, which you can use to find your purchase history respectively.
However, if you're using an older version of macOS or a Windows PC, you will still rely on the traditional iTunes app to access this information. Here's how you can access your purchase history through iTunes on your computer:
How to Check Purchase History on iTunes on Mac/PC
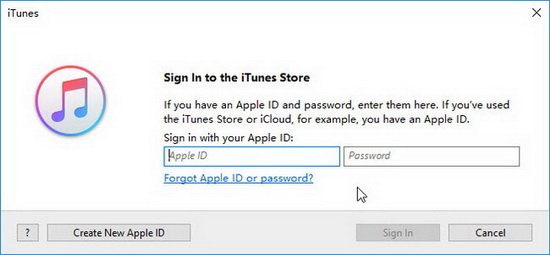
Step 1. Open and log in iTunes Store on Mac/PC: Start by opening iTunes on your computer. Sign in to your iTunes account using your Apple ID and password.
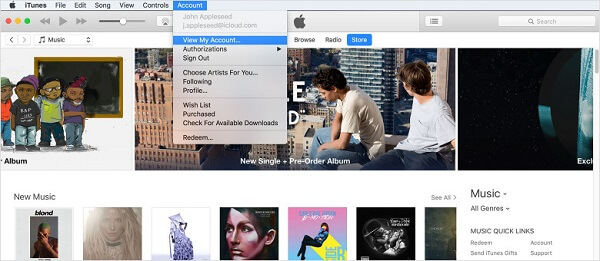
Step 2. View iTunes account info: From the iTunes menu bar, click on "Account" and select "View My Account." You'll be prompted to enter your password to access your account details.
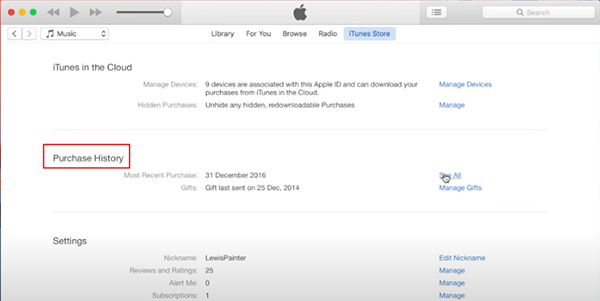
Step 3. Access to iTunes purchase history: Scroll down to the "Purchase History" section and click "See All." Here, you can view all the items you've previously purchased. The arrow next to the order date allows you to view detailed information about each transaction.
Note:
Depending on how many purchases you've made, loading your full purchase history may take some time. Once loaded, you'll see everything you've bought, including apps, music, TV shows, movies, and more. Recent purchases are displayed at the top, while older ones are listed by date.
Part 3. FAQs about Purchase History on iTunes
Why Checking Your iTunes Purchase History is Important?
Your iTunes purchase history serves several purposes:
- Redownload purchased content: If you want to revisit the classics you purchased on iTunes, you can find past purchases and re-download the content to any device linked to your Apple ID.
- Free up space storage: If you frequently buy songs, albums, movies, TV shows, etc. from iTunes, your library is likely quite large by now. You can check and delete old iTunes purchases to free up space on your device.
- Track spending: Reviewing your iTunes purchase history helps you monitor your spending on music, movies, and other content.
- Verify purchases: If you notice unfamiliar charges on your Apple ID account, you can see your purchase history to verify whether the transaction was legitimate.
How to Delete iTunes Purchase History?
Unfortunately, you cannot clear your iTunes purchase history entirely. However, you can hide certain items from appearing in your iTunes library or on your devices by finding the item you want to hide, swiping left on the item, and then tapping Hide.
How to Share iTunes Purchases to Other Accounts
Remember that iTunes restricts the sharing of video purchases to other accounts due to DRM protection unless you use iTunes Home Sharing. (Notes: iTunes music purchases are unprotected and you can share them easily.)
However, if you remove DRM protection from iTunes movies or TV shows, you can easily transfer purchased videos to other iTunes accounts without limitations.
The DRmare M4V Converter is a great tool for removing DRM from iTunes movie purchases (including rentals) and downloading and converting them to widely used formats such as MP4, MOV, AVI, etc. After conversion, you can transfer them to other accounts or devices without a problem.
Part 4. In Conclusion
Regularly checking your iTunes purchase history is a smart way to keep track of your digital content, manage your spending, and ensure your account's security. Whether on your iPhone, iPad, Mac, or Windows computer, you can now see purchase history on iTunes in a few simple steps.


How to share iTunes movies and TV shows to other accounts? This article offers some ways to achieve this goal in details.