


We have all been there. You just finished cutting a perfect travel vlog or a funny clip for your friends. You can hear the perfect soundtrack in your head—that one specific track from your "Summer Vibes" playlist on Spotify. You open VivaVideo, tap "Add Music," and… nothing. The playlist is empty.
It is incredibly frustrating, especially when you know you downloaded those songs for offline listening on Spotify. Why can't VivaVideo see them?
The reality is that streaming services and video editors don't speak the same language. But don't worry, I have dealt with this exact headache many times. Whether you are looking for a quick, free workaround or a professional way to get high-quality audio onto your timeline, I will walk you through exactly how to bridge the gap between Spotify and VivaVideo.
Part 1. Why Can't VivaVideo See My Spotify Downloads?
Before we fix it, it helps to understand the problem so you stop wasting time searching through folders that don't exist.
When you hit that "Download" arrow in Spotify, you aren't saving a standard MP3 file. Spotify saves cache files (specifically in an encrypted Ogg Vorbis format) that only the Spotify app can read. This is their way of protecting copyright (DRM).
VivaVideo, on the other hand, is a traditional editor. It looks for standard audio files like MP3, AAC, or WAV sitting in your phone's local storage. Since it cannot crack Spotify's encryption, those songs remain invisible to the editor. To fix this, we basically need to "translate" the music into a format VivaVideo understands.
Method 1: Put Spotify into VivaVideo Via Screen Recording
If you are just editing a casual video for a friend or an Instagram Story and you don't care about having perfect audio quality, you don't need fancy software. You can use a feature built right into your phone: Screen Recording.
This method essentially "tapes" the song while it plays. It is a bit clunky, but it works in a pinch.
Step 1. Open Spotify and cue up the song you want to use. Pause it at the beginning.
Step 2. Open your phone's control center and start screen recording.
Step 3. Switch back to Spotify and hit play. Let the song run for as long as you need it, then stop the recording. You now have a video file in your gallery that contains the song.
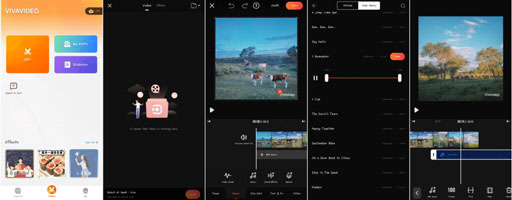
Step 4. Open your project in VivaVideo.
Step 5. Tapping "Music", look for the "Extract Audio" (sometimes labeled "Music from Video") option in the toolbar.
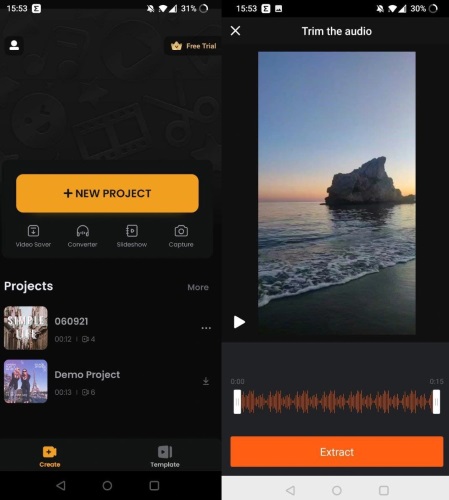
Step 6. Select the screen recording you just made. VivaVideo will strip the audio from that video and drop it onto your timeline as a sound track.
Note:
"Extract Audio" function requires an active VivaVideo Premium to activate.
Method 2: The Best with to Use Spotify in VivaVideo
If you are creating content for YouTube, TikTok, or a professional presentation, the screen recording method usually isn't good enough. The audio gets compressed twice, sounding "tinny", and managing a messy camera roll of screen recordings is a nightmare.
For my main projects, I use a dedicated converter to get actual MP3 files. This is where tools like DRmare Spotify Music Converter become essential. It acts as a bridge, decrypting the Spotify tracks and converting them into high-quality MP3s that VivaVideo can read natively.
What I personally appreciate about this method is that it keeps the ID3 tags (the artist name and album art). When you import the file into VivaVideo, it actually looks like a professional track rather than "Audio_Record_001".
How to Download Song from Spotify for VivaVideo
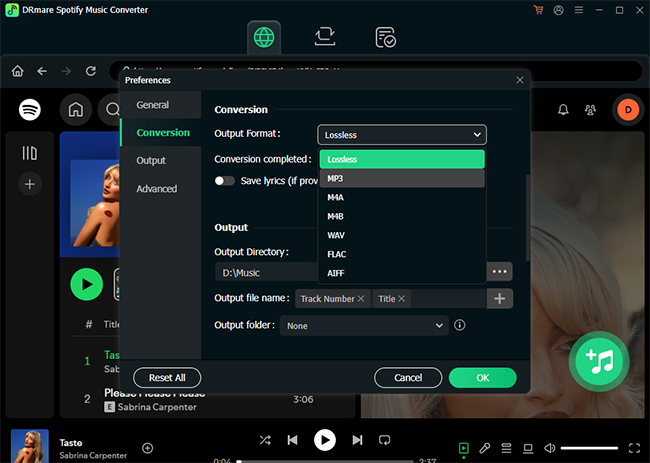
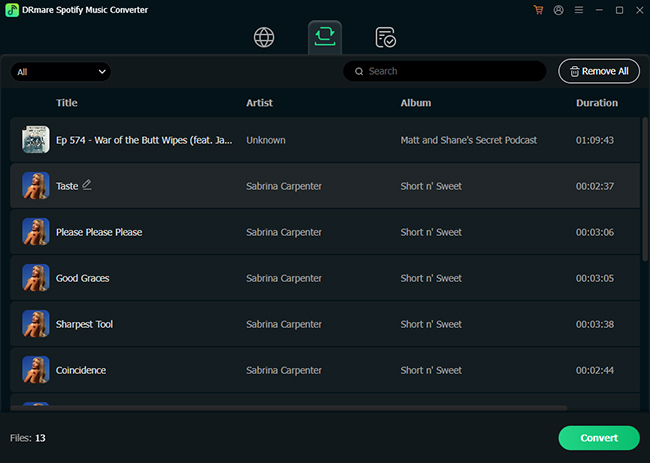
Step 1. Launch DRmare and log into your account using the built-in Spotify web player. Before you start selecting music, click the menu icon in the top-right corner and choose "Preferences" to set your output format to MP3; this ensures the files are fully compatible with VivaVideo.
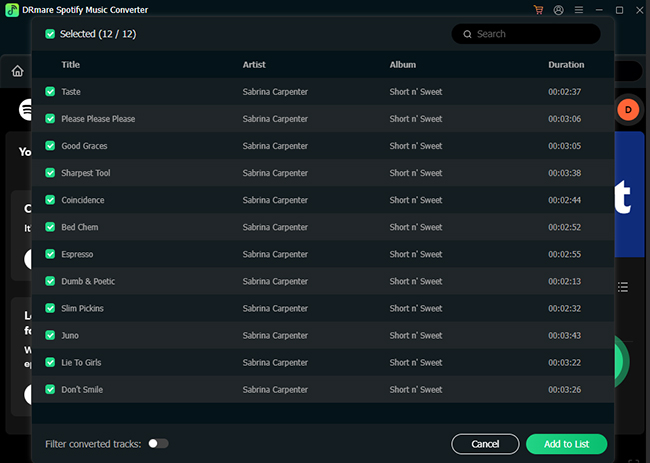
Step 2. Browse the web player for the playlist or album you want to use. Drag and drop the content directly onto the green Music icon floating in the bottom-right corner, then click "Add to list" to confirm the tracks you want to convert.
Step 3. Click the "Convert" button to start the process. The software will download and convert your selected songs in batch. Once the process is complete, click the "Converted" tab (often a history icon) to locate the actual MP3 files saved on your computer, ready for transfer.
Transfer Spotify Music to Your Phone
Now you have the MP3s on your computer, but VivaVideo is on your phone. Here is the easiest way to bridge that gap:
For iPhone Users: The smoothest way is using AirDrop (if you have a Mac) or iCloud Drive. Upload the MP3s to a folder in iCloud Drive. On your phone, open the "Files" app to confirm they are there.
For Android Users: Simply connect your phone to the computer via USB. Copy the MP3 files into your phone's "Music" or "Download" folder.
Import Spotify to VivaVideo
Now that the files are truly local, VivaVideo will welcome them with open arms.
Step 1. Open your VivaVideo project and tap the "Music" icon in the bottom toolbar.
Step 2. Select the "Local Music" or "My Music" tab.
Step 3. If you are on Android, the scan should happen automatically, and your songs will be listed. If you are on iPhone, you may need to select "Import from Files" and browse to where you saved the MP3s in the Files app.
Step 4. Tap the "Use" or "Add" button next to your song. It will appear on your audio timeline, ready for trimming and fading.
Final Thoughts
Adding your favorite Spotify tracks to VivaVideo shouldn't feel like hacking the Pentagon.
If you just need a 15-second clip for a meme, save yourself the hassle and use the Screen Recording method. But if you are serious about your video quality and want to build a library of usable tracks for future edits, taking the time to convert your playlist with a tool like DRmare is worth the effort. It gives you permanent ownership of the file and total control over your edit.


User Comments
Leave a Comment