


If you are putting the finishing touches on a video project, you probably already have the perfect background track picked out in your head. It is a common scenario: you find an incredible song on your Spotify playlist, you open up Microsoft Clipchamp, and you start looking for a way to connect the two apps.
Adding Spotify music directly into Clipchamp is a common goal for video creators, especially when building social media content, presentations, or personal edits. However, Spotify tracks do not behave like regular audio files inside video editors. Fortunately, you do not scrap your video project just yet. There are highly effective, completely legal workarounds to get the exact vibe you want into your timeline.
This guide explains why this limitation exists, and more importantly, exactly what you can do to fix your audio problem today, including how to still use Spotify music in Clipchamp in a practical and reliable way.
Part 1. Why You Can't Directly Add Music to Clipchamp from Spotify
At first glance, it feels like you should be able to drag Spotify songs into Clipchamp and start editing. After all, the music is already downloaded on your device if you use offline mode. But this is where the confusion begins.
The core issue comes down to Digital Rights Management, commonly known as DRM. When you pay for a Spotify Premium subscription, you aren't actually buying the MP3 files. You are paying for the right to access Spotify's highly encrypted Ogg Vorbis and AAC audio streams.
As a result, Spotify downloads are not real audio files like MP3 or WAV. Instead, they are encrypted and locked inside the Spotify app environment. That means Clipchamp cannot read, decode, or import them in any usable form.
Clipchamp, on the other hand, only works with standard audio formats that your system can recognize as editable media files, like MP3, WAV, or OGG. In simple terms:
- Spotify music = streaming-only encrypted content
- Clipchamp music import = requires local audio files (MP3, WAV, OGG)
Because of this mismatch, Spotify tracks will never appear correctly inside Clipchamp's media library.
Part 2. Best Way to Use Spotify Music in Clipchamp
Since direct import between Clipchamp and Spotify is not possible, the solution is to convert Spotify tracks into a Clipchamp-compatible format first. After that, the file behaves like any normal audio clip inside your project, allowing you to freely drag them into your project timeline, edit them, and sync them with video content.
Among the available tools, a dedicated converter such as DRmare Spotify Music Converter is commonly used for this workflow. It is designed specifically to help users download and convert Spotify songs, playlists, and albums into widely supported formats like MP3 or WAV while preserving audio quality and metadata. This approach is especially useful for video creators who want to reuse their Spotify playlists as background music in video editing projects without format limitations.
How to Convert Spotify Songs for Clipchamp
This section walks you through the full process of converting Spotify music into Clipchamp-compatible audio files using DRmare Spotify Music Converter. Follow each step carefully to ensure smooth conversion and high-quality output.
- Step 1Log in to Spotify Account Through the Built-in Web Player
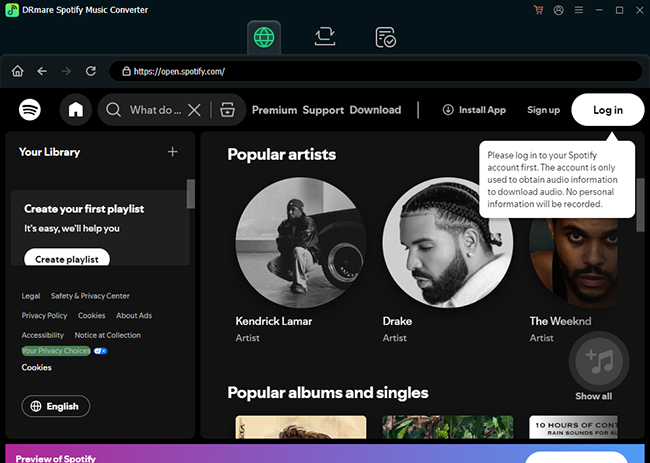
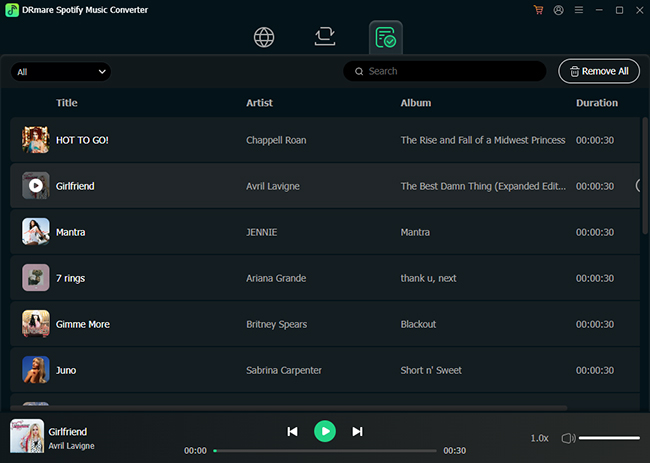
Start by launching the DRmare Spotify Music Converter application on your Windows or Mac device. Once opened, you will see a clean interface that integrates a built-in Spotify web player. Locate the Spotify login section and sign in using your regular Spotify credentials.
- Step 2Add Spotify Songs, Playlists, or Albums into the Converter
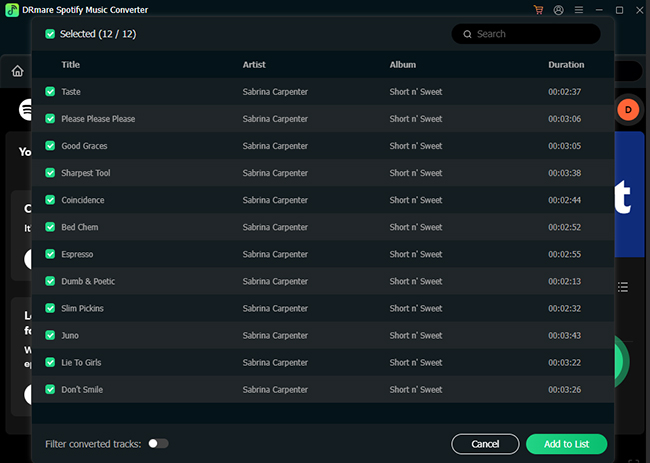
After logging in, your playlists, albums, and saved songs will automatically sync and appear within the Spotify Web Player. Once your library is loaded, browse your Spotify content directly inside the DRmare interface. To add Spotify music for conversion, you can open the item, click the Add > Add to List button.
Tips:
You can select multiple items at once if you want to convert a full Spotify playlist for background music use in Clipchamp.
- Step 3Select Output Format (MP3 or WAV Recommended for Clipchamp)
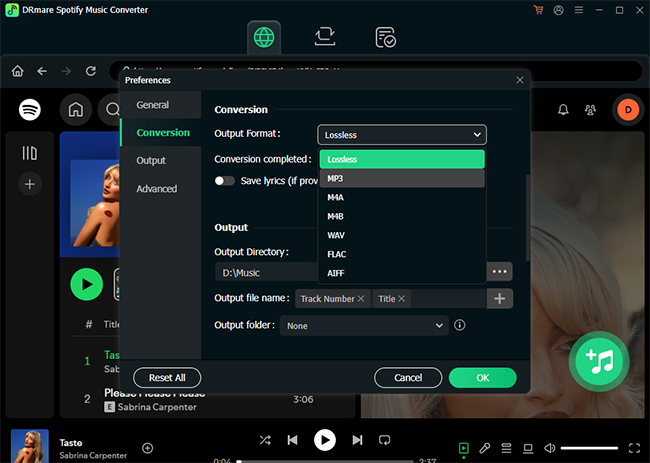
After adding your music, go to the output settings panel by clicking the Menu > Preferences > Conversion option. Here, you can choose the format that Clipchamp supports:
- MP3: Recommended for most users (smaller file size, widely compatible)
- WAV: Higher audio quality, larger file size
You can also adjust additional settings such as bitrate or sample rate if needed, but default settings usually work well for video editing purposes. This step ensures your Spotify music becomes fully compatible with Clipchamp's import system.
- Step 4Start the Conversion Process
Once everything is set, click the Convert button to begin processing your selected Spotify tracks. DRmare will decode Spotify audio streams and download Spotify tracks on your local computer with metadata preserved.
How to Import Converted Spotify Music Files into Clipchamp
After conversion, the music files are stored locally on your device in a standard format. At this stage, they are no longer restricted by Spotify and can be added directly into Clipchamp like any other audio file. Follow these steps:
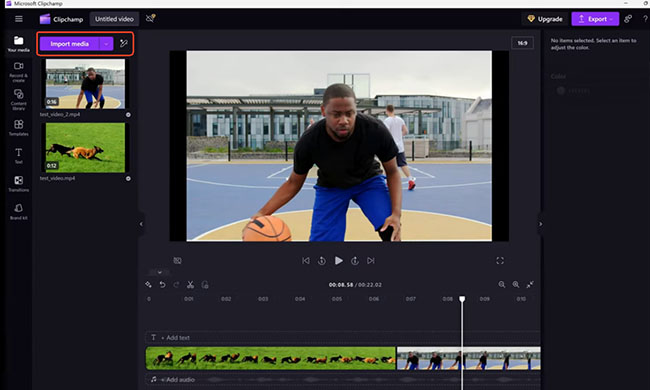
Step 1. Open Clipchamp and create a new project.
Step 2. Go to the "Your Media" tab and click "Import media" located in the upper-left corner of your Clipchamp project window.
Step 3. Locate and select your converted Spotify MP3 or WAV files from your computer. Wait for the upload to complete.
Add Spotify Music to Timeline and Edit Audio
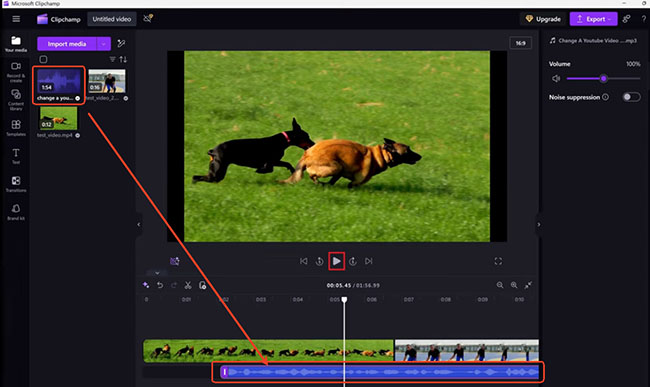
After importing, you can start building your video. Drag the Spotify audio file onto the timeline below your video track. From there, Clipchamp allows you to:
- Trim music length
- Adjust volume levels
- Add fade-in and fade-out effects
- Sync music with video transitions
This is where your Spotify music becomes part of a full video production workflow.
Part 3. The Best Alternatives to Get Great Audio into Your Clipchamp Videos
If converting Spotify music feels unnecessary or time-consuming, here are the most practical routes to take.
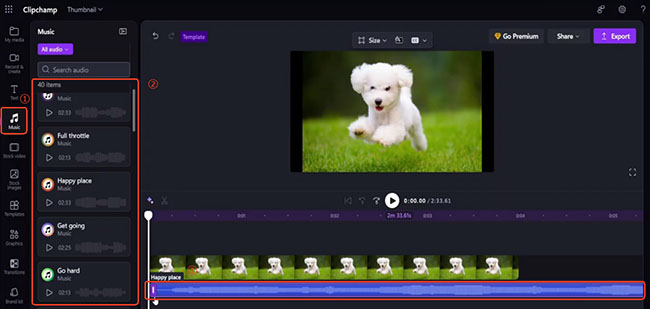
Alternative 1: Use Clipchamp's Built-In Audio Library
This is hands down the fastest method to get your video published. Clipchamp actually houses a massive library of royalty-free background music and sound effects right inside the editor workspace.
You can filter by mood, genre, or tempo to find something that matches the energy of the Spotify track you originally wanted. Because these tracks are fully licensed for use, you never have to worry about copyright strikes when you finally export and upload your project.
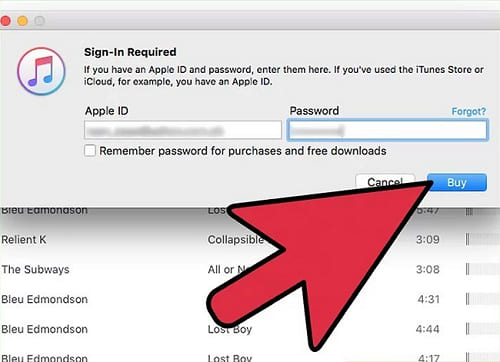
Alternative 2: Buy the Track Legally
If your video absolutely relies on one specific mainstream pop song and nothing else will do, your best bet is to buy a digital copy of the track.
You can purchase individual songs for about a dollar on platforms like iTunes or Amazon Music. When you buy music this way, you are usually provided with a standard, DRM-free MP3 or M4A file. Once that file is sitting on your computer's hard drive, Clipchamp will happily accept it.
Part 4. Spotify Music Not Working in Clipchamp? Common Fixes
Even after converting Spotify music, some users still run into import issues. These problems are usually related to file format or encoding rather than Clipchamp itself. Here are the most common situations:
1. Unsupported File Format
If Clipchamp does not recognize your file, it is likely not truly in MP3 or WAV format. Some conversions may fail silently or produce incomplete files.
2. Corrupted Audio Conversion
Interrupted downloads or failed conversions can result in unusable audio files.
3. Codec Compatibility Issues
Even if the file ends in ".mp3," unusual encoding settings can prevent Clipchamp from reading it correctly. A reliable fix is to re-export the audio in a standard MP3 format using widely supported settings.
Part 5. In Conclusion
Using Spotify music in Clipchamp is not as direct as many users expect. The main limitation comes from Spotify's DRM system, which prevents tracks from being used outside its ecosystem.
However, once Spotify songs are converted into MP3 or WAV, Clipchamp handles them without any issues. From there, you can freely edit, trim, and synchronize music with your video projects.
For faster workflows, Clipchamp's built-in music library and purchasing tracks legally also provide simple alternatives when conversion is not necessary. With the right approach, you can still bring your favorite Spotify tracks into your Clipchamp's video editing workflow without technical frustration.


User Comments
Leave a Comment