


Music plays a huge role in VRChat communities. Whether you are relaxing in a virtual world, attending a dance event, or hanging out with friends, the right soundtrack can completely change the experience. Many Spotify users wonder: Can you use Spotify with VRChat?
The answer is yes, but there is no official Spotify integration inside VRChat. The method you choose to connect Spotify to VRChat depends on what you want to do:
- Show your current Spotify status in your VRChat profile or chatbox using an OSC tool like VRCSongWiz
- Broadcast Spotify music through your microphone using VoiceMeeter
- Listen to Spotify privately while playing VRChat on Meta Quest using the built-in background media player
This guide will show you three proven methods for integrating Spotify with VRChat, complete with our own testing insights to help you get the best audio quality possible.

Testing Environment:
- Windows 11 PCVR
- Meta Quest 3 via Link Cable
- Spotify Desktop App
- VRChat Steam Version
- VoiceMeeter Banana
- VRCSongWiz
Part 1. How to Show Spotify Status in VRChat Chatbox (PCVR)
If you only want other players to know what you are listening to, displaying your Spotify status (the currently playing songs) on VRChat Chatbox is the easiest solution. This doesn’t send audio to other people but lets others see the artist and track title and current playback status, making it a great conversation starter. It works through VRChat’s OSC (Open Sound Control) feature, which allows external applications to send information into VRChat.
Display Spotify Music in VRChat via VRCSongWiz
- Step 1Enable OSC in VRChat

Before you begin, you need to make sure OSC is active. Open your Action Menu (the radial menu), go to "Options", and then select "OSC". Make sure the status is "Enabled".
- Step 2Download an OSC Tool
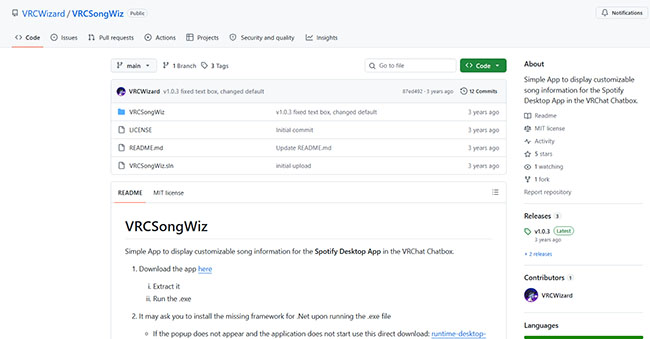
There are several great, easy-to-use applications for this. Based on our testing, a popular and stable choice is VRCSongWiz. You can find it on GitHub. Download the latest release and extract the files to a designated folder on your computer.
- Step 3Run VRCSongWiz and Spotify
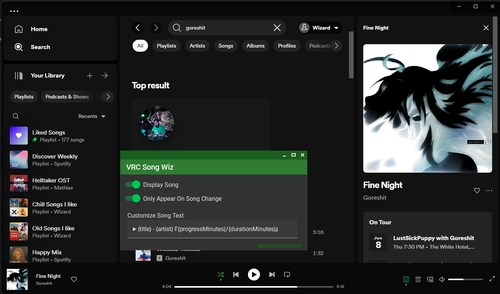
Make sure your Spotify desktop app is open and playing a song. Next, run the VRCSongWiz application. The tool will automatically detect detect your active Spotify session and begin sending that data to your VRChat chatbox. It will show what song your listening to on VRChat and your current track is now visible to everyone in your instance!
Editor's Real Test Result:
During testing, Spotify status appeared in VRChat chatbox within a few seconds after starting playback. However, switching Spotify accounts required restarting the OSC tool.
Part 2. How to Play Spotify Music Through Your Mic in VRChat
If you want other people in VRChat to hear your music, such as during a party, DJ event, or social gathering, you need to route Spotify audio directly through your avatar's microphone. By default, VRChat only sends your microphone input. Spotify audio will not be transmitted unless you create an audio routing setup. The most common solution is using VoiceMeeter Banana together with a virtual audio cable.
Play Spotify Through Your Mic in VRChat via VoiceMeeter
- Step 1Install VoiceMeeter and a Virtual Cable
Download and install VoiceMeeter Banana alongside the VB-CABLE Virtual Audio Device. It is essential to restart your computer after installation to ensure your computer correctly recognizes the new virtual audio drivers.
- Step 2Configure Your Windows Sound Settings
In your Windows Sound settings, set your default playback device to VoiceMeeter Input (VB-Audio VoiceMeeter VAIO).This routes your general desktop audio through the mixing software.
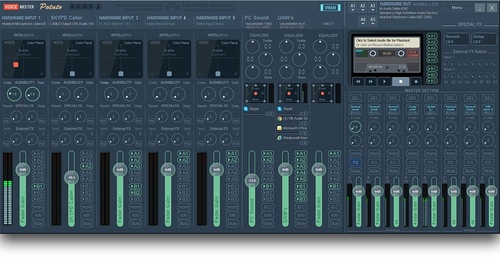
- Step 3Set Up VoiceMeeter Banana
Open VoiceMeeter Banana to access the mixing board interface.
- Assign Your Mic: In the first "HARDWARE INPUT" column, select your actual microphone (e.g., WDM: Microphone (Your Mic Name)).
- Assign Spotify's Audio: In the second "HARDWARE INPUT" column, select CABLE Output (VB-Audio Virtual Cable).
- Route Audio: In both columns, make sure the "B1" button is selected. This sends both your microphone audio and the virtual cable's audio to the same virtual output.
- Step 4Route Spotify to the Virtual Cable
Navigate to the Windows "App volume and device preferences" menu. Locate Spotify in the list of active apps and change its specific "Output" device to VoiceMeeter Cable Input.
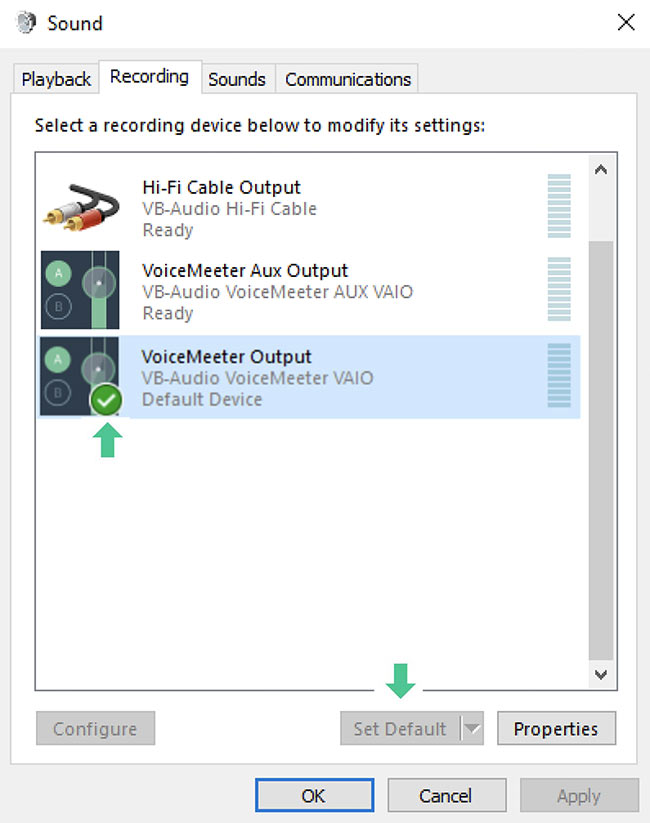
- Step 5Select the Correct Microphone in VRChat
Finally, open VRChat and go to your Audio settings. Change your Microphone to VoiceMeeter Output (VB-Audio VoiceMeeter VAIO). Now, When you speak or play music on Spotify through VRChat, the audio will now broadcast clearly to the room.
Note:
In our experience hosting VRChat events, relying on live streaming can be risky. Live streaming is entirely dependent on your internet connection. Any buffering or bandwidth dips will cause stuttering and audio artifacts for your listeners. Furthermore, unexpected mid-song advertisements can instantly ruin the immersion of a virtual party.
Pro Tips: Preparing Local Spotify Music for VRChat DJ Sessions:
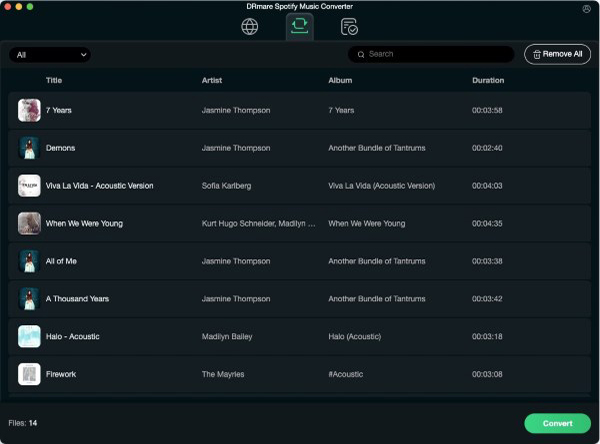
If you regularly host virtual parties, music worlds, or community events, playing local audio files through a media player can provide a more stable experience. Instead of relying on Spotify's live stream, you can prepare your music library in advance and play tracks directly through software such as VLC Media Player or other audio players. For users who want to create an offline music library from Spotify playlists, tools such as DRmare Spotify Music Converter provide a way to prepare audio files before entering VRChat.
It can download your Spotify tracks into universal formats like MP3, FLAC, and WAV. Crucially for VRChat DJs, DRmare automatically blocks all Spotify ads and retains lossless audio quality. It also preserves original ID3 tags, meaning your local media player will correctly display track names and cover art on your desktop while you mix.
Part 3. How to Play Spotify Privately in VRChat on Quest 2 & 3
PCVR users have more audio-routing options, but standalone headsets such as Meta Quest 2 and Meta Quest 3 work differently. If you use VRChat directly on Quest, you generally cannot send Spotify audio to other players. However, you can still listen to your own Spotify music privately on Meta Quest while playing VRChat. Your Spotify songs will only be heard by you.
How to Play Music in VRChat on Quest 2 & 3
Step 1. Open Spotify on your Quest headset. You can do this by launching the official app or navigating to the Spotify web player via the Meta Quest Browser. Start playing your music.
Step 2. When you launch VRChat, your music will automatically pause during the loading screen. Don't worry, this is normal behavior for the Quest operating system.
Step 3. Press the Meta button on your right controller to open the universal menu. You will see a media player panel displaying the app or browser you just used. Press the play button on this panel to resume your track. The music will now play in the background, audible only to you.
Part 4. Spotify VRChat Setup Comparison
To help you decide which setup is best for your virtual reality sessions, we have summarized the methods below:
| Method | Platform | Public/Private | Audio Quality | Ease of Use | Best For |
|---|---|---|---|---|---|
| OSC Spotify Status | PCVR | Public (Visual Only) | N/A | Easy | Showing current song |
| Broadcast (Streamed) | PCVR | Public (Audio) | Variable (Internet Dependent) | Complex | Sharing music with others |
| Broadcast (Local Files) | PCVR | Public (Audio) | Lossless / High | Complex | VRChat DJ events |
| Background App | Quest 2/3 | Private (Audio) | Standard | Easy | Personal listening |
Part 5. FAQs About Playing Music in VRChat With Spotify
Can Other Players Hear Spotify in VRChat?
By default, no. VRChat only transmits your microphone input. To share Spotify audio, you need to route Spotify output into a virtual microphone using tools like VoiceMeeter.
Can I connect Spotify directly to VRChat?
No. VRChat does not have a built-in Spotify connection or official music streaming feature. However, you can still combine Spotify and VRChat using third-party OSC tools or audio routing software.
Does Spotify work on VRChat Quest 2/3?
Yes, but only for private listening. Quest standalone users cannot normally broadcast Spotify audio to other players.
Why does Spotify stop when I open VRChat?
Quest may pause background apps when launching VR applications. You can resume playback from the Meta universal menu.
Can I use Spotify while DJing in VRChat?
Yes. For casual sessions, VoiceMeeter can route Spotify audio into VRChat. For larger events, many users prefer preparing local music files because playback is more stable and easier to manage.
Part 6. Conclusion
Whether you are a PCVR power user aiming to become a world-famous club DJ or a Quest player who simply wants some background ambiance, there is a perfect solution for bringing Spotify into VRChat. By choosing the method that matches your hardware and preparing your audio setup in advance, you can seamlessly integrate your favorite music and elevate your virtual reality experience.


User Comments
Leave a Comment