


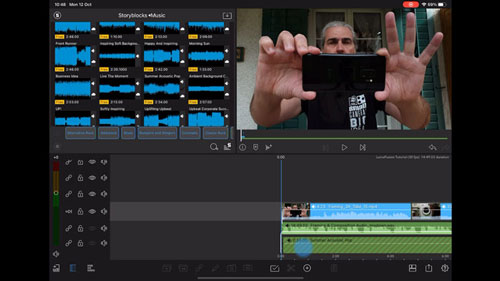
If you are editing video on an iPad or iPhone, LumaFusion is likely your weapon of choice. It's powerful, intuitive, and rivals desktop editors. But every editor eventually hits the same frustrating wall: you have the perfect song in your Spotify playlist that would elevate your edit, but you can't get it onto your timeline.
You've tried downloading the song in Spotify. You've tried dragging and dropping. Nothing works.
This isn't a bug; it's a format conflict. As an occasional video editor, I know that audio is 50% of the experience, and being blocked from using your creative assets is maddening. In this guide, I'll explain exactly why this happens and walk you through the professional workflow to legally transfer your Spotify library into LumaFusion for your personal projects.
Part 1. Why You Can't Directly Import Spotify into Lumafusion
Before we fix the problem, it helps to understand it. LumaFusion is a professional non-linear editor (NLE). To display that waveform on your timeline that you can cut, fade, and mix, LumaFusion needs a static, unencrypted audio file—typically an MP3, WAV, or M4A.
Spotify, however, doesn't provide these files. Even if you pay for Premium and "download" songs, you are actually downloading cached, DRM-encrypted Ogg Vorbis files. These files are locked inside the Spotify app. LumaFusion literally cannot read them because it doesn't have the "key" to unlock that encryption.
To bridge this gap, you don't need a hack; you need a converter. You need a tool that can remove Spotify's DRM and convert the audio into a standard format that LumaFusion understands.
Part 2. Standard Way to Prepare Spoify Audio for Lumafusion
To get high-quality audio from Spotify into an edit-ready format, I use DRmare Spotify Music Converter.
While there are many converters out there, I prefer this one for video editing workflows for two specific reasons:
✅Lossless Quality: You can convert to WAV, which is uncompressed. When you re-export your final video, you want the source audio to be as high-quality as possible to avoid "digital sludge."
✅Metadata Retention: It keeps the Artist, Title, and Album Art tags. This is crucial for LumaFusion. If you strip this data, your LumaFusion library will just be a mess of "Track01.mp3" files, making it impossible to find what you need later.
From Spotify Playlist to LumaFusion Timeline
Here is the exact workflow I use to move tracks from my computer to my iPad for editing.
- Step 1Setup and Settings
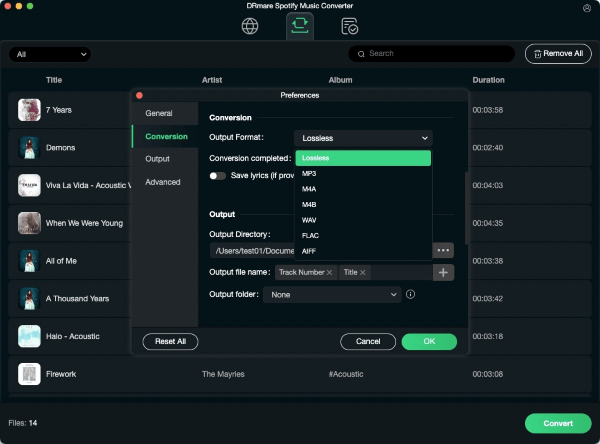
Launch DRmare Spotify Music Converter and log into your account using the built-in Spotify web player. Before selecting music, click the menu icon (top right) and select Preferences. Under the "Conversion" tab, set your output format to MP3 (for standard use) or WAV (for lossless editing) and adjust your quality settings.
- Step 2Select and Add Music
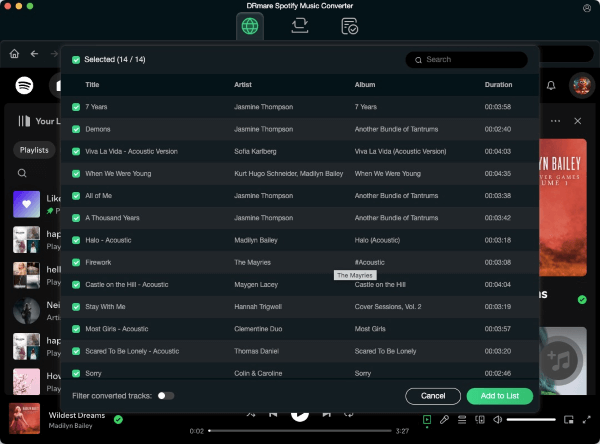
Browse the built-in web player to find the track or playlist you need. Drag and drop the content directly onto the green Music icon in the bottom-right corner. A list will pop up—simply click "Add to list" to confirm your selection.
- Step 3Convert and Locate
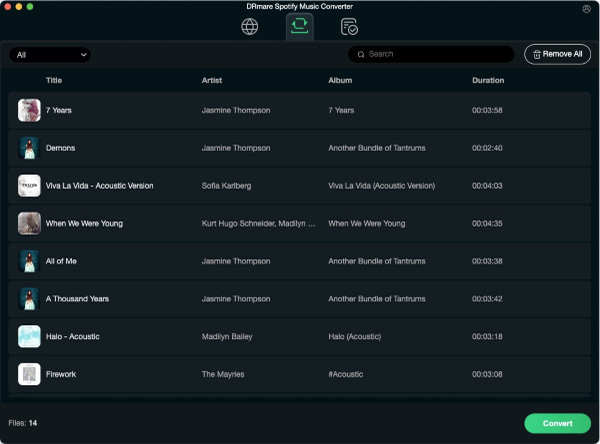
Click the "Convert" button to start the batch download. The software will process your files at high speed. Once finished, navigate to the "Converted" tab (or History icon) to find your newly unlocked, static audio files on your computer, ready for transfer.
- Step 4Transfer to iPad/iPhone
This is the part most tutorials skip, but it's where most people get stuck. You have the file on your computer, but LumaFusion is on your iPad. Here is how to bridge that gap.
Option A: For Mac Users (The "AirDrop" Method)
This is the fastest method.
Step 1. Locate your converted files in Finder.
Step 2. Right-click the file(s) and select Share > AirDrop.
Step 3. Select your iPad from the list.
Step 4. On your iPad, a menu will pop up asking which app to open the file with. Tap LumaFusion. The track will be instantly imported.
Option B: For PC/Windows Users (The "Cloud" Method)
If you don't have a Mac, iCloud Drive or Google Drive is your best friend.
Step 1. Upload your converted Spotify MP3/WAV files to a folder in iCloud Drive (or Google Drive/Dropbox) on your PC.
Step 2. Open the Files app on your iPad and ensure the files have synced and are visible there.
- Step 5Editing in LumaFusion
Now that the files are accessible on your device, let's get them onto the timeline.
Step 1. Open your project in LumaFusion.
Step 2. Tap the Library Sources icon (the flower/box icon at the top left) to open the media browser.
Step 3. Select Files (if you used the Cloud Method) or Imported (if you used AirDrop).
Note:
If you used AirDrop, the song should already be in the "Imported" folder. If you used iCloud, navigate to the folder where you saved the music.
Step 4. Locate your song. Because DRmare preserved the metadata, you should see the correct song title and artist name, not just a random filename.
Step 5. Drag the audio file down to the audio track on your timeline. You can now see the waveform, trim the beat, and mix it just like any other professional asset.
Part 3. Final Thoughts
LumaFusion is an incredible tool that turns your iPad into a mobile editing suite, but it plays by strict rules regarding file formats. By using a tool like DRmare Spotify Music Converter, you aren't just downloading music; you are converting it into professional assets that play nice with your editor.
It gives you the creative freedom to edit with the music you love, provided you use that power responsibly. Happy editing!


User Comments
Leave a Comment