


Are you looking for a convenient way to sync your Apple Music library across devices? If yes, Sync Library Apple Music is the best solution. It's a premium and handy feature that allows you to sync your entire music library, including songs you've added from Apple Music and songs uploaded from your personal collection, on all of your devices. When enabled, your music collection is stored in iCloud, giving you access to your songs, playlists, and albums wherever you are.
However, there may be times when your music doesn't sync properly across your devices, or you're having trouble enabling the Sync Library feature. In this guide, we'll show you how to turn on Apple Music Sync Library and provide troubleshooting steps to fix Apple Music library not syncing you might encounter.
Part 1. What Is Sync Library Apple Music?
The Apple Music Sync Library feature allows you to sync your entire music collection across all your devices effortlessly. When enabled, all the songs in your library - including those added from Apple Music and your personal collection - are automatically synced across devices that are signed in with the same Apple Account. This means you can access your music on your iPhone, iPad, Mac, Apple Watch, Apple TV, and even your PC without manually transferring files.
Additionally, any changes you make, such as creating playlists or deleting tracks, are instantly reflected on all your devices. This feature makes managing your music library seamless and convenient, ensuring that you don't have to deal with syncing issues one device at a time.
Part 2. How to Turn on Apple Music Sync Library Across Devices
Before diving into the steps, note that Sync Library on Apple Music is only available if you have an active Apple Music or iTunes Match subscription. Also, remember that Sync Library doesn't serve as a backup service. It just makes a copy of your songs available in iCloud. Always ensure you have a local backup of your music for safety. Now, let's see how to sync library on Apple Music on iPhone, iPad, Mac, and PC.
How to Sync Apple Music Library on iPhone/iPad to Mac
Step 1. Make sure you are signed in with the same Apple Account that you use with other devices.
Step 2. Open the Settings app and tap on 'Music'.
Step 3. You should see the 'Sync Library' option that is disabled under the Library section.
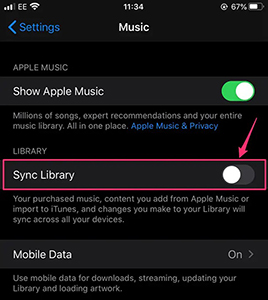
Step 4. Turn on Sync Library on your iPhone. Wait for your library to sync. This process might take a while depending on the size of your library and internet connection. After that, you can see your full Apple Music library on other devices.
How to Sync Apple Music Library on Mac to iPhone/iPad
Step 1. Open the Apple Music app on your Mac computer.
Step 2. Check if you are using the same Apple Account that you use with your Apple Music subscription.
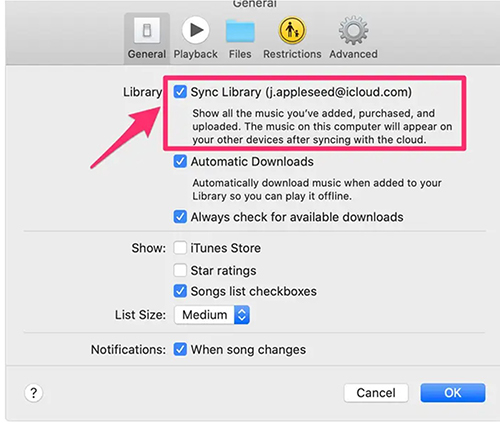
Step 3. In the top menu, click on 'Music' > 'Preferences' and then choose the 'General' tab.

Step 4. Toggle on 'Sync Library' option to enable Sync Library on Apple Music on Mac. Then click on 'OK' to save your changes.
Step 5. Make sure you have enabled Sync Library on your other devices, like iPhone or iPad. Your library will begin to sync from Mac to them.
How to Sync Library on Apple Music on PC
Step 1. Open iTunes app on your Windows computer or Apple Music app on Windows 11.
Step 2. From the menu bar at the top of your screen, click on the 'Edit' option at the menu bar and select 'Preferences'.
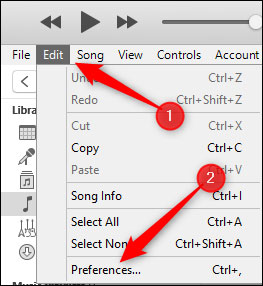
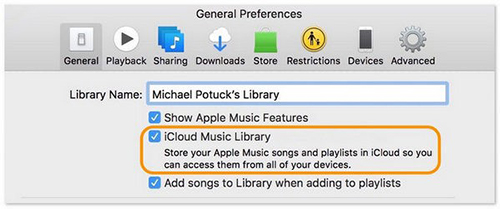
Step 3. Under the General tab, check the option for iCloud Music Library (or Sync Library). Click OK to enable the feature and begin syncing your music.
Tips: Sync Apple Music from Mac/PC to iPhone/iPad
If you have a USB cable nearby, you can sync your Apple Music library from your computer to iPhone and iPad manually with the help of iTunes or Finder app. Follow these steps:
- Connect your iPhone or iPad to your computer using a USB cable.
- Click the Device icon in the top-left corner of the iTunes window or Finder app.
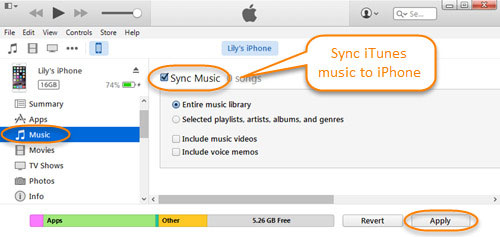
- In the left sidebar, click Music.
- Check the box that says Sync Music. If you want to sync your entire music library, select Entire music library. If you only want to sync selected playlists, artists, albums, or genres, choose Selected playlists, artists, albums, and genres.
- Click Apply or Sync at the bottom-right corner to start syncing your Apple Music library from your Mac or Windows computer to your iPhone or iPad.
Part 3. How to Back up and Sync Apple Music Library Anywhere
Since Apple Music Sync Library isn't a true backup service but a syncing feature, and it can simply sync your music library to limited Apple-authorized devices. It's a good idea to have a local backup of your favorite Apple Music playlists, especially in case your subscription expires. This also helps you sync library on Apple Music to all devices.
You can use third-party software like DRmare Apple Music Converter to convert and back up your Apple Music playlists locally on your computer. It allows you to 30X convert Apple Music tracks to MP3, AIFF, FLAC, and other formats with lossless quality. It ensures 100% lossless sound quality and complete ID3 tags. This way, you can sync and access your Apple Music across devices even if your subscription ends.

- Convert Apple Music to MP3, FLAC, M4A, M4B, AIFF, and WAV
- Ensure 100% lossless audio quality and ID3 tags such as title, etc.
- Batch convert Apple Music tracks at a 30 faster speed
- Customize the output format, channel, bit rate, and more
How to Convert and Sync Library on Apple Music Anywhere
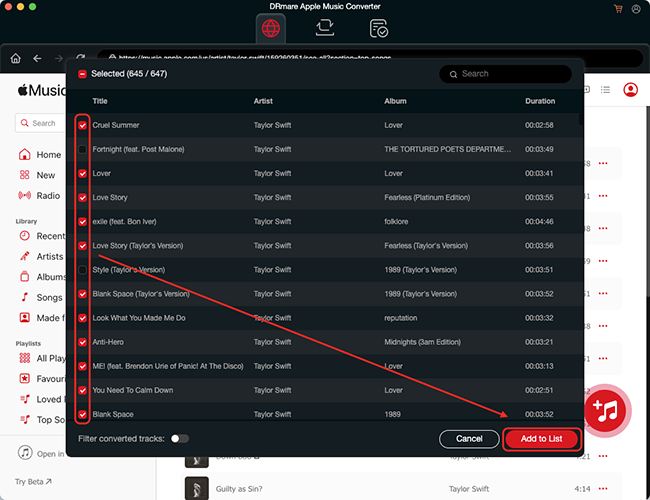
- Step 1Add Apple Music files to DRmare Apple Music Converter
Click the "Download" link to install the free trial version of DRmare Apple Music Converter. Then open it and you will see the integrated Apple Music Web Player. You can then click the "Add" > "Add to List" button to select and import them from your music library to the conversion queue.
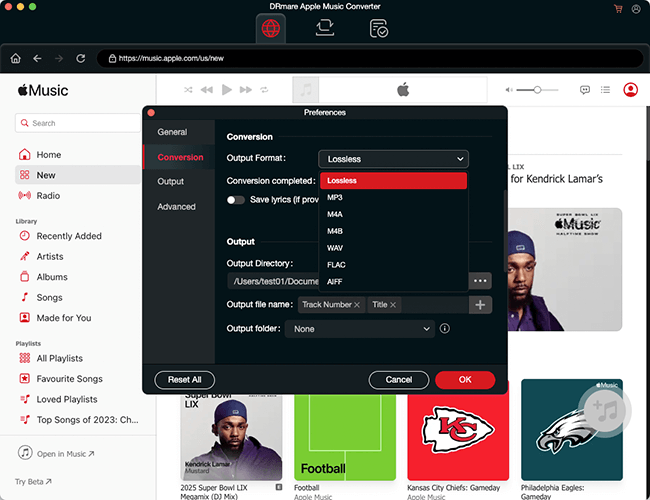
- Step 2Customize Apple Music output format
By default, DRmare Apple Music Converter will automatically convert your imported songs to MP3. You can reset the output format and other parameters before converting Apple Music. To do this, click the "Menu" > "Preferences" > "Conversion" button to select the desired output format, sample rate, audio rate, etc. Then click the "OK" button to apply the changes.
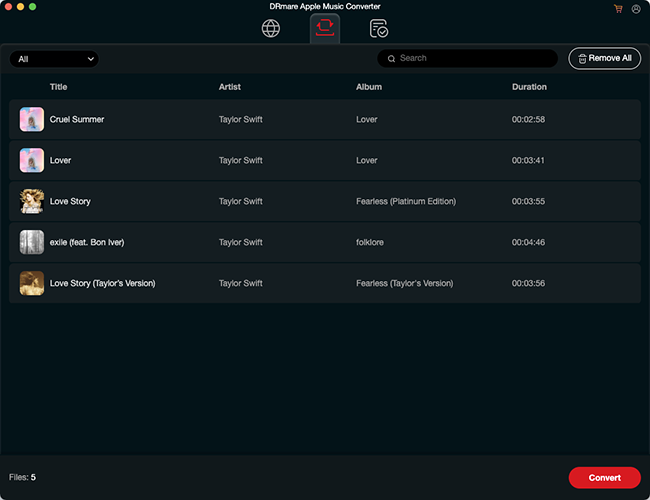
- Step 3Download and back up Apple Music anywhere
Click the "Convert" button and it will batch convert all the Apple Music songs you added at 30X speed. When it's over, you'll have a copy of Apple Music on your local drive. You can find them in your computer's folders by clicking on the "Output" folder. Or, you can directly click the "Converted" tab to find and listen to Apple Music offline. Now, you can connect your device to your computer and sync Apple Music downloads to it without any problem.
Part 4. Why Is My Apple Music Library Not Syncing
Apple Music's Sync Library is an essential feature that allows you to access your entire music collection across all your devices. However, many users occasionally face issues where their Apple Music library does not sync between devices correctly. For example, Apple Music Sync Library keeps turning off or Apple Music Sync Library is not showing.
This can be frustrating when playlists or songs fail to appear on different devices, or changes made on one device don't reflect on others. Before jumping into the fixes, it's essential to understand why this issue might occur. Here are some common reasons your Apple Music playlist is not syncing properly:
Why Is Apple Music Playlist Not Syncing
- Expired Apple Music Subscription: Sync Library requires an active Apple Music or iTunes Match subscription. Without it, syncing won't work.
- Sync Library or iCloud Music Library Disabled: Syncing relies on iCloud Music Library or Sync Library being turned on for all devices.
- Different Apple Accounts: If you're signed in to different Apple Accounts on various devices, your music library won't sync.
- Weak Internet Connection: Syncing requires a strong and stable internet connection, whether through Wi-Fi or mobile data.
- Outdated Software: Running an outdated version of iOS, macOS, Music, or iTunes could cause syncing issues.
- Large or Corrupted Music Library: A large or corrupted music library can overwhelm the syncing process, causing errors or delays. If your music library contains corrupted files or is particularly large, syncing can be interrupted or incomplete.
Part 5. How to Fix Apple Music Library Not Working
After figuring out the common reasons why your Apple Music playlist isn't syncing correctly, let's see how to resolve the issue below:
1. Check Your Apple Music Subscription
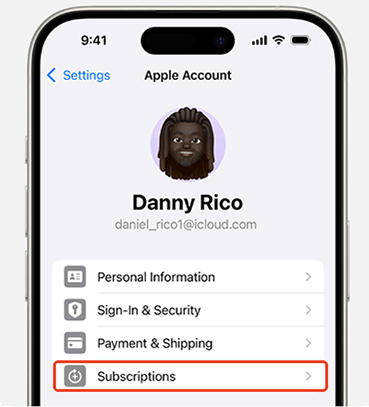
The first step is ensuring your Apple Music or iTunes Match subscription is active. Without a subscription, Sync Library won't function.
On your iPhone/iPad:
- Open Settings.
- Tap [Your Name] at the top and go to Subscriptions to check your Apple Music status.
On Mac/PC:
- Open Music or iTunes.
- Click on Account > View My Account and check your subscription details.

2. Enable Sync Library on All Devices
Make sure Sync Library is turned on across all devices to ensure proper syncing. You can refer to the complete steps in Part 2 to check them one by one. If Sync Library is enabled but still seems stuck or not working, try turning it off and then back on.
3. Check Your Internet Connection
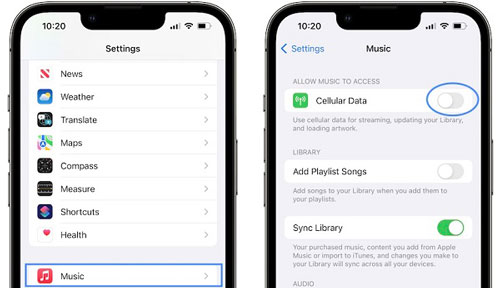
A weak or unstable internet connection can disrupt the Apple Music playlist syncing process. Make sure you're connected to a stable Wi-Fi network or have sufficient cellular data.
- Switch to a different Wi-Fi network if available.
- Try toggling Airplane Mode on and off to reset the connection.
- Ensure cellular data is enabled for Apple Music under Settings > Music > Cellular Data.
4. Restart Your Devices
Restarting your devices can help resolve temporary glitches that may be causing syncing issues.
- Mac: Click on the Apple menu and select Restart.
- PC: Click the Start menu, then select Restart.
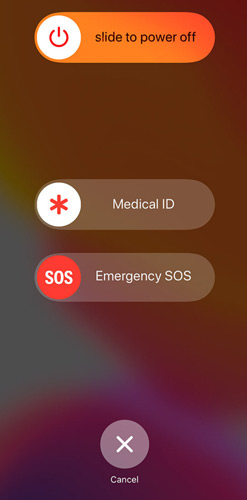
- iPhone/iPad: Hold the power button, then slide to power off. Turn it back on after a few seconds.
5. Update Your Device's Software
Ensure your device is running the latest version of its operating system. Apple frequently releases updates that resolve bugs, including those related to Apple Music library not syncing.
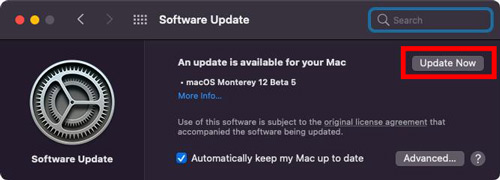
- Mac: Open System Preferences > Software Update to update macOS.
- PC: In iTunes or Music app, go to Help > Check for Updates to ensure you're using the latest version.
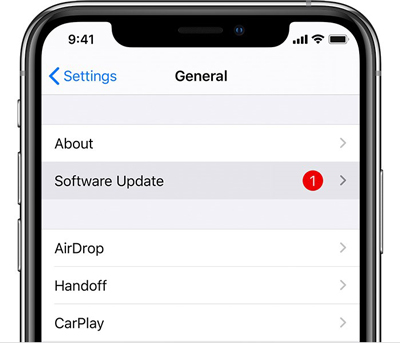
- iPhone/iPad: Go to Settings > General > Software Update to download the latest iOS version.
6. Address Large or Corrupted Music Libraries
A large or corrupted music library can interfere with the syncing process. If your library contains corrupted files or is too large, syncing may take longer or fail entirely.
- Remove Corrupted Files: Manually check for songs that may be causing issues and delete or re-download them.
- Break Up Large Playlists: If you have very large playlists, try splitting them into smaller ones and syncing again.
- Sync Manually via USB Cable: Rather than syncing the entire library at once, try syncing smaller portions of it to reduce the load. Connect your device to your computer via the USB cable and then select target songs manually for syncing.
7. Sign Out and Back In to Your Apple Account
Signing out of your Apple Account and signing back in can refresh your account and resolve Apple Music syncing problems.
On iPhone/iPad:
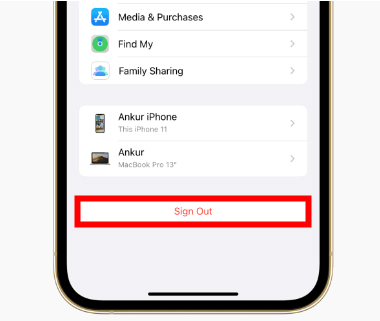
- Go to Settings > [Your Name].
- Scroll down and tap Sign Out.
- Sign back in with your Apple Account.
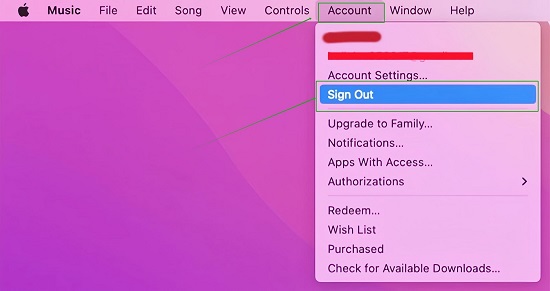
On Mac/PC:
- Open Apple Music or iTunes.
- Go to Account > Sign Out.
- Sign back in with your Apple Account.
Part 6. In Conclusion
Apple Music Sync Library is a powerful feature that allows you to enjoy your full Apple Music collection across devices. By enabling it, you can seamlessly access and manage your library without worrying about manual syncing.
However, if you encounter Apple Music library not syncing issue, the troubleshooting tips in this guide should help resolve them. And for those who want to sync and back up their Apple Music tracks locally on all devices, tools like DRmare Apple Music Converter are a great solution to keep your music accessible wherever you go even without an active Apple Music subscription.


User Comments
Leave a Comment