


Apple's iCloud Music Library seamlessly integrates a user's music collection across multiple devices, such as syncing Apple Music to play on Apple Watch. It enables a consistent listening experience regardless of location or device. However, despite its conveniences, there are valid reasons why a user might opt to turn off iCloud Music Library.
The decision to disable iCloud Music Library is not merely about convenience but also involves strategic management of data usage, storage space, and personal preferences. Understanding the nuances of this decision is crucial, as it impacts the way in which users interact with their music collections and navigate the digital landscape.
With this context in mind, let us explore the detailed steps required to turn off iCloud Music Library on iPhone, iPad, Mac and PC. It ensures that we can make an informed choice aligned with our individual needs and priorities.
Part 1. FAQs about iCloud Music Library
To begin with, understanding what iCloud Music Library is important. What is iCloud Music Library? It is Apple's music storage and backup service. With it, you can sync your Apple Music library between up to 10 Apple devices using the same iCloud account.
However, many users complained that their music metadata was messed up or even songs disappeared. And the truth is, even if you've built your music library, you still won't have access to your Apple Music songs when your subscription expires. So, you can choose to deactivate iCloud Music Library in seconds.
Here are some questions that doubt a lots of Apple Music users, let's read them and learn more about turning off iCloude Music Library issues.
What Happens If I Turn off iCloud Music Library?
Switching off iCloud Music Library can avoid all syncing errors. But once iCloud Music Library turns off:
Your devices will no longer sync.
It will delete all cloud music including Apple Music downloads.
The good news is that you can still access all your purchased songs through iTunes. And these songs can be streamed on your Apple devices.
Can I Backup Apple Music without iCloud Music Library?
Yes. DRmare Apple Music Converter is the best tool to back up Apple Music, iTunes music library, or other audio files. It doesn't degrade any audio quality and downloads your songs 30x faster. Saved audio files will be stored on your computer, or you can choose to move them to a USB drive for backup.
How to Turn Off iCloud Music Library on iPhone XR?
From the Settings app on your iPhone XR, select the 'Music' section. Then scroll down to find 'iCloud Music Library'. Toggle off this option to turn iCloud Music Library off.
How to Turn on iCloud Music Library?
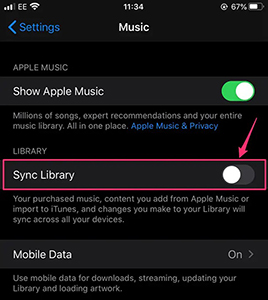
Opening the iCloud Music Library is as simple as reversing the steps. On an iPhone, turn "Sync Library" back on; On a Mac, check the box for "Sync Library"; On Windows, check the box for "iCloud Music Library".
Part 2. How to Turn Off iCloud Music Library on iPhone/iPad
iCloud Music Library is turned on by default, so if you don't want automatic syncing, you'll need to turn it off manually. But how can we turn iCloud Music Library off in a effective way? Especially when we use our iPhone or iPad, is there any targeted method to switch off our iCloud Music Library? If you are confused with this trouble, please take the following steps. It will perfectly solve your problem.
For iPhone and iPad Users:
Step 1. Power your iPhone or iPad and go to the 'Settings' app.
Step 2. Scroll down to tap on 'Music'.
Step 3. If your device is an earlier version of iOS: turn off 'iCloud Music Library'.
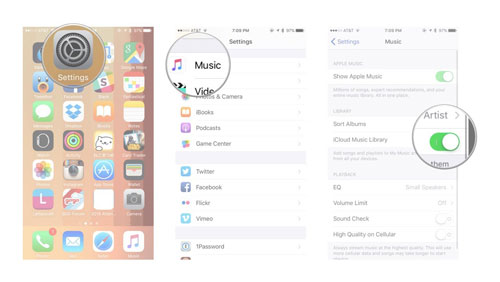
If your device is iOS 13, iPadOS 13, or later: turn off 'Sync Library'.
Step 4. Once the button turns gray, iCloud Music Library is disabled.
Part 3. How to Turn Off iCloud Music Library on Mac or PC
If you are using your Apple Music and iCloud Music Library on your Mac or other computers, it's different from mobile users to turn off your iCloud Music Library. Here, we provide a detailed guide to troubleshoot your problem of turning off iCloud Music Library on computer. Let's follow this guide step by step.
For Mac Users:
Step 1. Open Apple Music on your Mac computer.
Step 2. Select the 'Music' tab at the top. Then select the 'Preferences' option in the drop-down list.

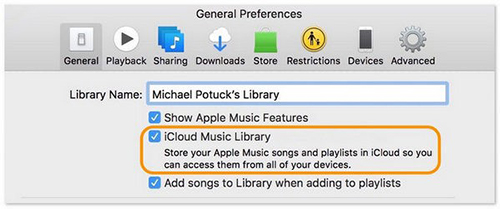
Step 3. In the 'General' tab, uncheck the 'Sync Library' option. (If you do not subscribe to Apple Music or iTunes Match, this option will not be previously checked. You can re-enable the sync feature at any time by checking the checkbox again.)
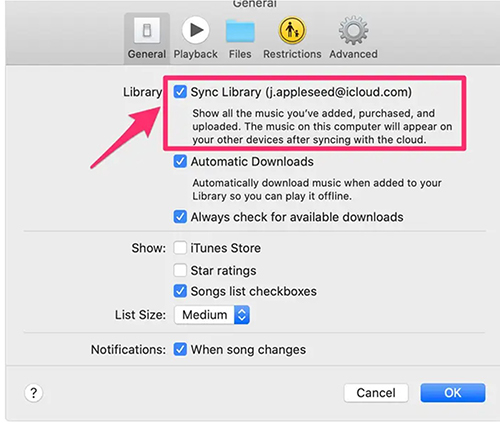
Step 4. Click on the 'OK' button at the bottom.
For Windows PC Users:
Step 1. Open Apple Music or iTunes on your PC.
Step 2. From the top menu bar, click on the 'Edit' option. Then select 'Preferences' at the bottom of the drop-down list.
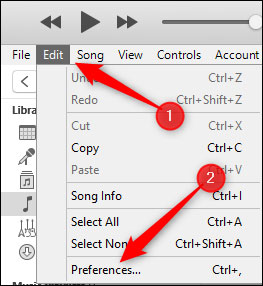
Step 3. Uncheck 'iCloud Music Library' in the 'General' tab. (Similar to Mac, this option won't be checked if you do not currently subscribe to Apple Music or iTunes Match.)
Step 4. Click on the 'OK' button to save your changes.
Part 4. How to Backup Apple Music Library Without iCloud
Backing up Apple Music with iCloud Music Library is very inconvenient because once you cancel the subscription, you will lose access to Apple Music songs. Thankfully, DRmare Apple Music Converter offers a better way to store and backup your Apple Music library.
It is a refined downloader for Apple Music and iTunes songs. With it, you can extract music from Apple Music to popular audio files. All of these files will be saved to your local drive so you can keep them forever. Plus, the download speed is up to 30x faster, so you can back up your Apple Music as quickly as possible.

- Download and keep Apple Music after unsubscribing
- Convert Apple Music to MP3, M4A, AIFF, M4B, etc.
- Keep original sound quality and full metadata
- Work at up to 30 times faster, play anywhere
How to Back up Apple Music after Turning Off iCloud Music Library
Above the 'Download' link is a free trial version of DRmare Apple Music Converter. You can try it to back up Apple Music for playing forever.
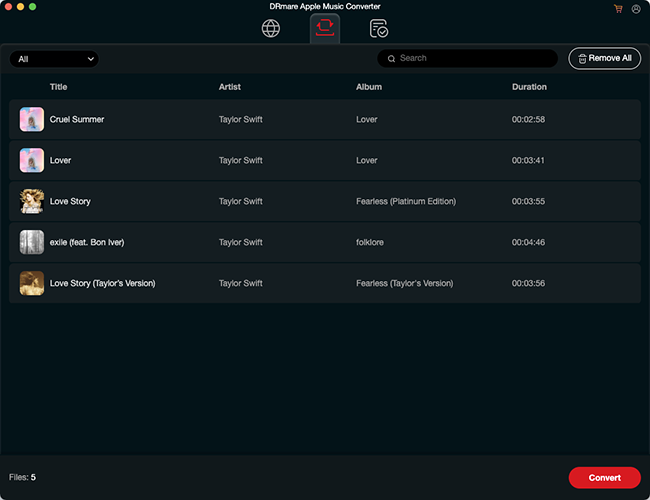
- Step 1Add Apple Music to DRmare Apple Music Converter
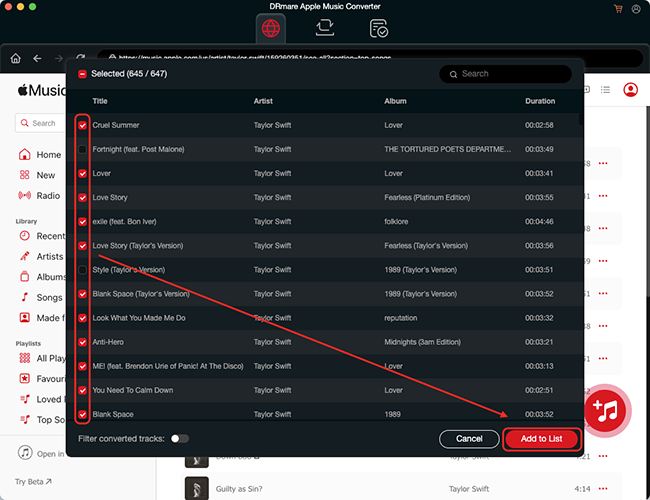
- DRmare Apple Music Downloader features a fully integrated Apple Music Web Player, completely replacing the old method of using bottom-left buttons to browse an external iTunes library or load files from local computer folders. Click the 'Sign In' button within the built-in web player to log into your Apple Account and browse for the songs, albums, or playlists you want to download. Once you open the target item, click the red '+' button followed by the 'Add to List' button to instantly load the tracks into the conversion queue.
- Step 2Customize Apple Music output parameters
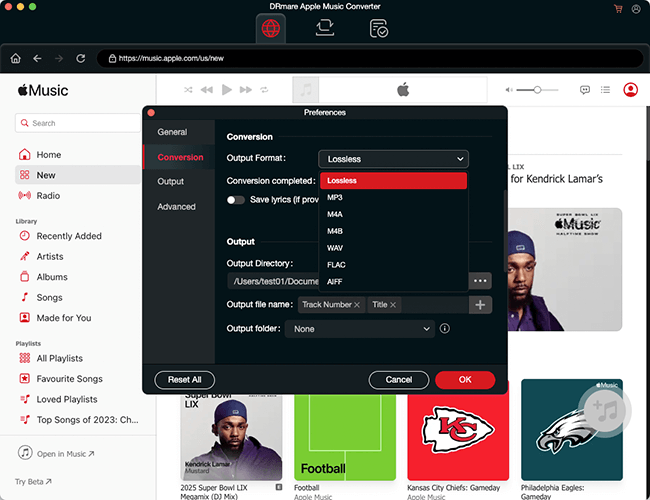
- DRmare Apple Music Converter allows you to change the output format and other audio parameters. You can click on the 'Menu' > 'Preferences' option to choose your desired output format and change the sample rate, audio rate, and others. Then click on the 'OK' button to save your changes.
- Step 3Download and back up Apple Music songs
- Hit the 'Convert' button to start downloading and backing up your Apple Music songs. When the process is done, you can click on the 'Converted' icon at the bottom right to find the downloaded files.
Within these simple steps, you will easily and quickly backup your Apple Music without iCloud.
Conclusion
While iCloud Music Library offers the convenience of universal access to your music collection, turning it off can be beneficial for those looking to conserve data or storage space. And if we turn off iCloud Music Library, we'd better find some useful tools to help us back up our Apple Music datas safely.
We hope that you can find the answer you wanted through this passage. Now, let's start a more enjoyable Apple Music listening journey!


User Comments
Leave a Comment