


Are you an avid music listener juggling both Tidal and Apple Music? You're not alone. Whether you're moving platforms or just want to consolidate your favorite tracks, transferring your carefully curated Tidal playlists to Apple Music is a common challenge.
Since neither service allows a direct, native transfer of protected music files, you need to rely on specialized playlist converter tools. This comprehensive guide breaks down the four most effective methods, from dedicated offline software to quick online services, to help you export your Tidal library to Apple Music (iTunes) easily and safely.

Part 1. How to Transfer Tidal Playlist to Apple Music via Offline Solution
Tidal and Apple Music are both music streaming services that don't allow users to move music files from one service to another. If you don't want to sync them one by one, the best solution is to use a third-party Tidal to Apple Music Converter, like DRmare Streaming Audio Recorder.
It provides a reliable way to keep high-quality copies of your Tidal music and can import them into Apple Music (iTunes) without relying on matching services. It can download Tidal tracks as plain audio files (like MP3, WAV, or FLAC), and save them locally on your computer. It supports batch conversion for large playlists at a fast rate. Once converted, these Tidal files can be easily added to your Apple Music/iTunes library.
How to Convert Tidal Playlist for Apple Music
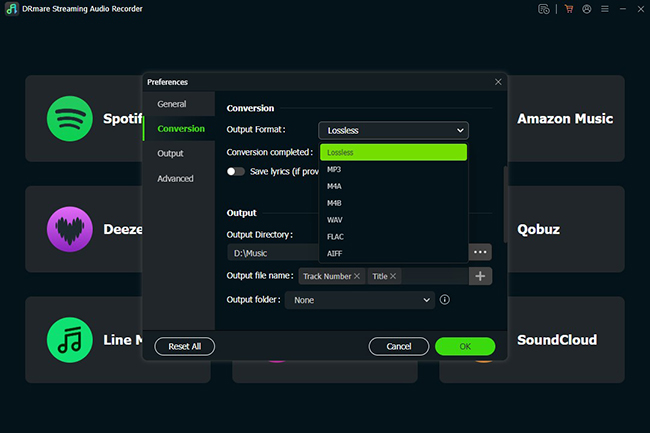
Step 1. After installing and launching the DRmare program, you can see the main interface with supported streaming music services. You can click the 'Menu' icon to choose the 'Preferences' > 'Conversion'. Here, you can select your desired output format (e.g., MP3 or M4A for best Apple Music compatibility). You can also adjust the bit rate, sample rate, and channel for optimal audio quality.
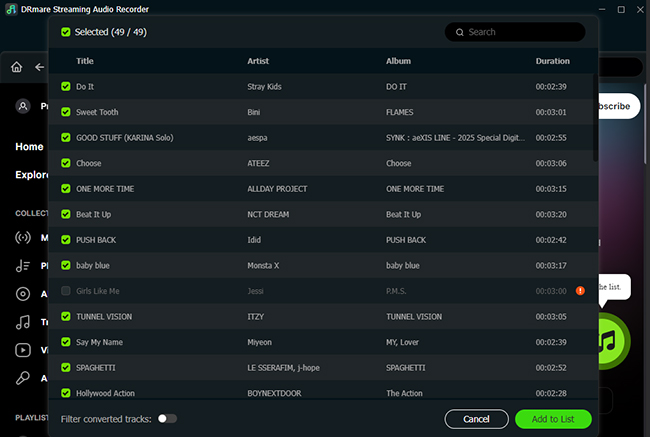
Step 2. Click the 'Tidal' icon to open the Tidal playlist to Apple Music converter. Log into your Tidal account, locate your desired Tidal playlist, and tap it to open the detailed page. Click the 'Add" > 'Add to List" button to load them to the conversion queue.
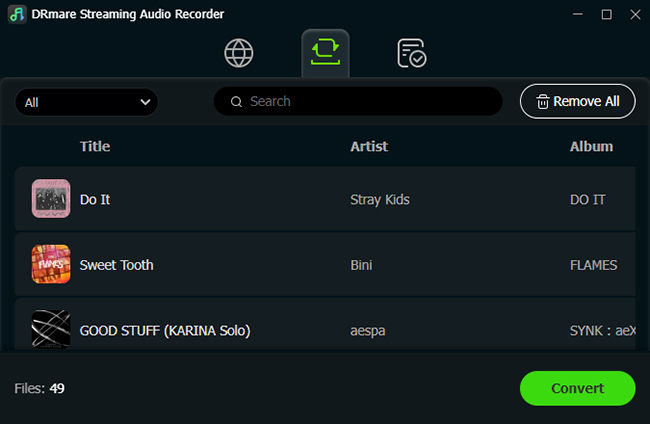
Step 3. Hit the 'Convert' button at the bottom-right corner, DRmare Streaming Audio Recorder will rapidly download and convert the Tidal tracks into your chosen local format. Once complete, click the 'Converted' folder icon to locate the files on your computer.
How to Transfer Playlist from Tidal to Apple Music
After using DRmare Streaming Audio Recorder, you can export Tidal playlist for Apple Music as local files. Now, you can start to move Tidal playlist to Apple Music via the steps below.
Step 1. Open the iTunes program or Apple Music app on your computer desktop. Then log in with your Apple Music account.
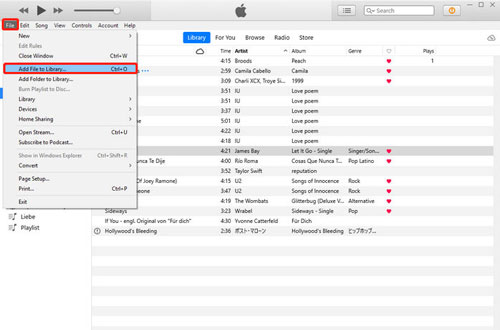
Step 2. Head to 'File' > 'Add File to Library' at the top-left bar of iTunes.
Step 3. Locate the converted Tidal playlist on your computer and import it to the iTunes Library.
Step 4. Once added, you can hit 'Songs' on the left side of iTunes to check the Tidal music files on iTunes Library.
After that, the process of Tidal to Apple Music is done. At last, you can listen to Tidal music on Apple Music without any limitations.
Part 2. How to Import Playlist from Tidal to Apple Music via Online or Mobile Solutions
If you don't require permanent local files but instead want a quick, web-based tool to automatically replicate your playlists, online streaming transfer services are the ideal choice. These platforms work by connecting directly to your Tidal and Apple Music accounts, reading the song metadata (Title, Artist, Album), and matching those songs in the destination catalog. This process is fast and requires no software installation.
In this section, we will walk you through three of the most popular and reliable Tidal to Apple Music playlist transfer tools available today: Soundiiz, TuneMyMusic, and FreeYourMusic. While they all function similarly, they each offer unique features and pricing structures (many offer limited free tiers for testing).
Note:
Since these services rely on matching, any song available on Tidal but not on Apple Music (or vice versa) will be skipped.
Export Tidal Playlist to Apple Music via Soundiiz
Soundiiz is one of the most popular web-based playlist management tools. It transfers your playlists by matching song metadata (artist and title) between the two services, rather than transferring the actual audio files.
Step 1. Open your computer's web browser and head to the Soundiiz official website. Also, you need to log in to your Soundiiz account.
Step 2. Hit on the 'Platform to Platform' icon from the left side. And then select Tidal as the source service in the 'Settings' window. Next, you need to link Tidal with Soundiiz.
Step 3. Choose the Tidal music you want to transfer and select the destination option 'Apple Music'. Here, you need to connect your Apple ID to Soundiiz. After that, the transfer process from Tidal to Apple Music will begin.

Transfer from Tidal to Apple Music via TuneMyMusic
TuneMyMusic is another widely used service that functions similarly to Soundiiz, offering a straightforward web interface for playlist migration. For more details, you can check out the step-by-step tutorial below.
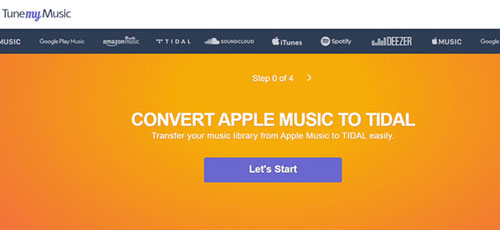
Step 1. Go to the TuneMyMusic website and click on the 'Let's Start' button.
Step 2. Choose the source music service 'Tidal' from the available options.
Step 3. Sign in to your Tidal account and click on the 'Continue' tab.
Step 4. Pick the Tidal music playlist you want to import to Apple Music.
Step 5. Select 'Apple Music' as the target destination platform. Then, TuneMyMusic will start to move your Tidal playlist to Apple Music for you. After that, you can enjoy Tidal music on Apple Music with ease.
Import Tidal Playlist to Apple Music via FreeYourMusic
FreeYourMusic is a dedicated app (available on Windows, Mac, iOS, and Android) that focuses solely on migrating playlists between streaming services, making it a highly user-friendly choice for cross-platform transfers. Now, let's find out how it works.
Step 1. Download and install the FreeYourMusic app on your device.
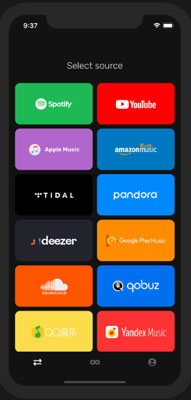
Step 2. Open the FreeYourMusic app and choose 'Tidal' as the source platform.
Step 3. Select 'Apple Music' as the destination music platform.
Step 4. Search for the playlist that you like to transfer from Tidal to an Apple Music playlist.
Step 5. Confirm your selection and start to export your Tidal playlist to Apple Music.
The Verdict: Which Transfer Method is Best?
| Method Category | Best For | Pros | Cons |
|---|---|---|---|
| 1. Offline Software | Permanent offline files, highest quality, large libraries. | Converts Tidal songs to permanent local MP3/FLAC files. Keeps original quality (lossless). | Requires software purchase/registration for full functionality. |
| 2. Online/Mobile Software | Quick, one-time transfers, smaller libraries. | Free or low-cost for basic transfers. No software installation needed. | Transfer often based on song name/metadata match (not the actual audio file). Limited batch processing on free tiers. |
All four tools will successfully transfer your Tidal playlists to Apple Music, but the best choice depends on your priorities:
- If your primary goal is high-fidelity audio, complete control over the files, and a permanent offline backup, DRmare Streaming Audio Recorder is the superior, long-term choice.
- If you need a quick, one-time transfer and don't mind relying on song-matching accuracy, the online services Soundiiz or TuneMyMusic are excellent, often free, options.
Do you have a large Tidal library, or are you looking to transfer just a few specific playlists to Apple Music?


User Comments
Leave a Comment