





If you already use Kodi as your home media center, you may wonder whether you can bring Apple Music into the same setup. This question is especially common among users who run Kodi on Raspberry Pi, Linux servers, Android TV boxes, or other home theater devices.
Unfortunately, Kodi is built around managing your own digital media and Apple Music is a locked-down streaming service; there's no official Apple Music add-on you can just install from the repository. But don't worry! You absolutely don't have to switch devices to enjoy your Apple Music playlists. After doing quite a bit of tinkering, here is how I actually get Apple Music working on Kodi.
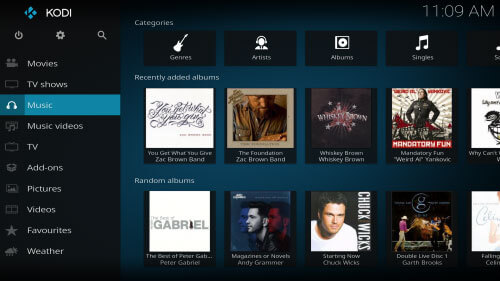
Why Isn't There an Official Apple Music Add-on for Kodi?
The primary obstacle preventing a simple plugin installation is Apple's proprietary FairPlay DRM (Digital Rights Management) encryption. This security measure is designed to keep playback strictly within authorized Apple applications and certified partner devices. Open-source platforms like Kodi generally lack the licensing and native architecture required to authenticate and bypass these closed-ecosystem encryptions directly.
Because a functional public add-on is currently unavailable, users rely on the following two methods to enjoy Apple Music with Kodi:
- Use Kodi's built-in AirPlay receiver to stream music from iPhone, iPad, or Mac
- Convert Apple Music tracks to local audio files and add them to Kodi's music library
Method 1. Use Kodi AirPlay Receiver to Stream Apple Music
If you just want to stream a playlist from your iPhone or Mac without overthinking it, AirPlay is your best friend here. Kodi actually has a built-in AirPlay receiver, allowing compatible Apple devices to send audio or media streams to Kodi over the local network. And in my testing, I found that turning it on is incredibly straightforward.
- Open Kodi and go to Settings.
- Select Services to access your network configuration options.
- Under the General tab, enable the option labeled Announce Services to other systems in Zeroconf so your Apple devices can detect the Kodi player on the network.
- Navigate to the AirPlay tab within that same menu and enable Allow Kodi to receive AirPlay content.
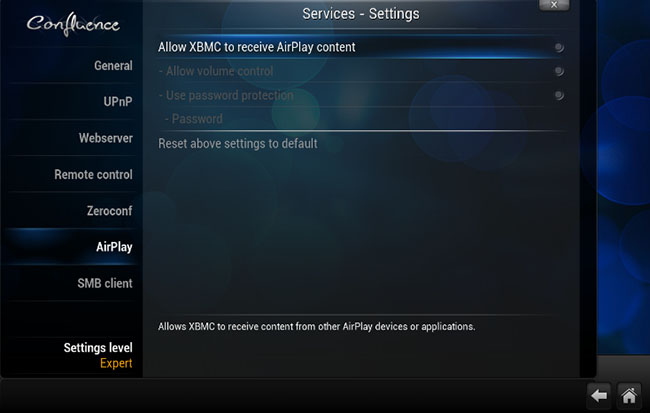
Note:
Before starting, make sure:
- Your Apple device and Kodi device are connected to the same Wi-Fi network.
- Kodi is updated to a version that supports AirPlay receiving.
- Your network allows device discovery through Bonjour/Zeroconf.
Once that's done, your Kodi device just shows up in your Apple Music AirPlay menu. It's super convenient for casual listening or when you have guests over who want to play DJ.
However, I have to be honest about the drawbacks: it essentially turns your beautiful Kodi media center into a dumb speaker. You don't get to see your library interface on the TV; you have to control everything from your phone, and depending on your network stability, you might experience occasional latency or dropouts.
Method 2. Convert and Add Apple Music to Kodi Music Library
This brings me to the method I actually use on a daily basis. Kodi shines the brightest when it's managing a well-organized local library, scraping metadata, and giving you that immersive visual experience on your big screen. It handles high-quality formats like ALAC and FLAC beautifully.
But as we know, Apple Music offline downloads are heavily protected. You can't just drop them onto a USB drive and expect Kodi to read them. During my own setup process, I found that the most effective way to bridge this gap is by taking control of the files yourself. I regularly use DRmare Apple Music Converter to process my playlists. It allows me to convert my Apple Music tracks into common audio formats like FLAC.
What I absolutely love about doing it this way is that the converter preserves all the ID3 tags. When I moved those converted files over to my NAS and let Kodi scan the folder, everything populated flawlessly: album art, artist info, and genres.
It feels completely native, and the audio fidelity remains top-notch without any spectral frequency cutoffs. If you care about audio quality and want a true home theater experience without relying on a Wi-Fi stream, this is hands down the way to go.
How to Convert Apple Music for Kodi
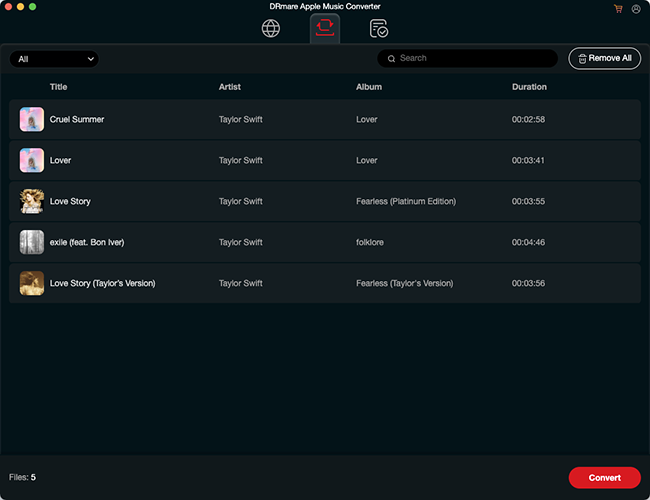
Step 1. Open DRmare Apple Music Converter and authorize your Apple Account. Use the built-in web player to load Apple Music tracks into the conversion queue.
Step 2. Click the Menu and Preferences options to customize output settings and ensure perfect compatibility with Kodi. You can also tweak the sample rate and bit rate here to maintain the highest audio fidelity.
Step 3. Click the Convert button. DRmare will process the tracks at high speed, strip the playback restrictions, and save the audio files to your local drive.
How to Add Music Files to Kodi
Step 1. Launch Kodi and select Music from the left-hand home menu.
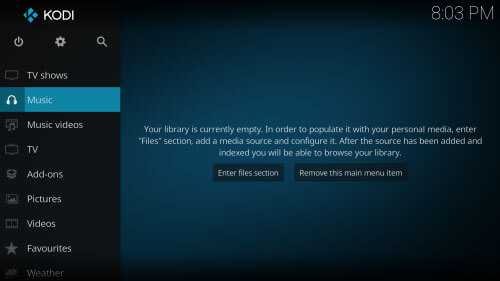
Step 2. Click on Files, then select Add music...
Step 3. Click Browse and navigate to the local folder or NAS drive where your converted DRmare tracks are stored. Select the folder and click OK.
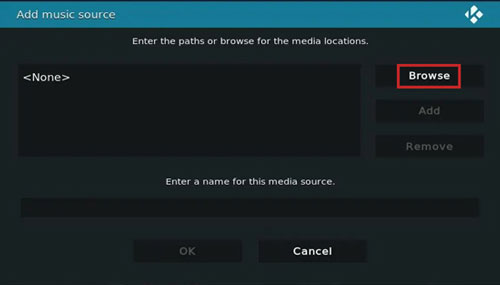
Step 4. Name the media source and click OK again. When Kodi asks, "Do you want to add the media from this source to your library?", select Yes.
Kodi will immediately scan the folder, read the ID3 tags preserved during the conversion (including album art, artist info, and track numbers), and seamlessly integrate the music into your home theater library.
Knowing When to Let Apple Hardware Take Over
Finally, I've learned that sometimes it's okay to let different devices do what they do best. If you don't want to bother with file conversion or AirPlay streams, the path of least resistance is often just plugging an Apple TV into another HDMI port on your receiver. Let Kodi handle your massive collection of movies and local media, and let the Apple TV handle the Apple Music streaming.
Making Apple Music work on Kodi is all about choosing the workflow that fits your listening habits. Whether you're casually airplaying a podcast or meticulously building a lossless local library, you can definitely make the two ecosystems play along.

 Home
Home





User Comments
Leave a Comment