


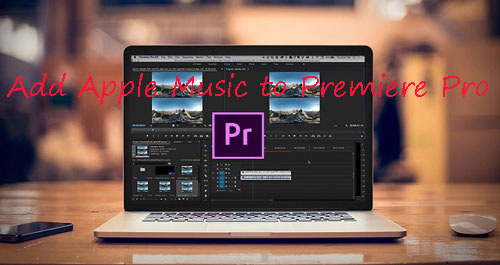
Adding music to your video projects in Adobe Premiere Pro can elevate the quality of your content significantly. Whether you're using tracks from your iTunes library or Apple Music, the process involves a few steps to ensure compatibility and smooth integration. Here's a comprehensive guide to help you add iTunes music or Apple Music to Premiere Pro.
Part 1. Can You Add iTunes Music/Apple Music to Premiere Pro?
To get the answer to this question, it's necessary to dive into the audio formats of them. You can have a quick glance at the table below.
| Platform | Supported Audio Format |
|---|---|
| Adobe Premiere Pro | Unprotected MP3, AAC, M4A, WAV, AIFF, etc. |
| Apple Music | Encoded M4P |
| iTunes purchases | AAC |
| DRmare Apple Music Converter | MP3, AAC, M4A, WAV, FLAC, M4B |
Can You Add Apple Music to Adobe Premiere Pro?
Apple Music tracks are usually protected and encoded in M4P format, which means they cannot be directly imported into Premiere Pro. However, DRmare Apple Music Converter can convert Apple Music to audio files supported by Premiere Pro. Then it's able to import Apple Music into Premiere Pro as background music.
Can You Import iTunes Music to Premiere Pro?
If you buy music from the iTunes Store, its audio format is AAC. It's compatible with Premiere Pro, so you can add and use it directly in Premiere Pro.
Part 2. How to Add Apple Music to Premiere Pro
First, let's dive into the process of adding music to Premiere Pro from Apple Music. DRmare Apple Music Converter has the ability to convert not only Apple Music, but also Audible and iTunes audiobooks to audio files supported by Premiere Pro. It supports six audio formats including MP3, AIFF, M4B, M4A, WAV, and FLAC.
With a clean user interface, it just requires several clicks to finish the conversion. Plus, it can batch convert Apple Music files to MP3, etc. at a fast 30X speed. By using it, you can save lots of your time. It won't touch any sound quality so you can get lossless Apple Music for Premiere Pro or any other platforms. The process is easy, here is how to.

- Support batch conversion at a super-fast 30X speed
- Convert Apple Music M4P to MP3, etc. supported by Premiere Pro
- Available for Apple Music, Audible, iTunes, and other music files
- Keep lossless sound quality and all the metadata information
How to Convert Apple Music for Adobe Premiere Pro
You can follow the steps below to convert protected Apple Music and iTunes songs and then put them into Premiere Pro. To begin with, please download and install DRmare Apple Music Converter on your computer. You can click on the "Download" button above or go to DRmare's official website.
- Step 1Import downloaded Apple Music to DRmare Apple Music Converter
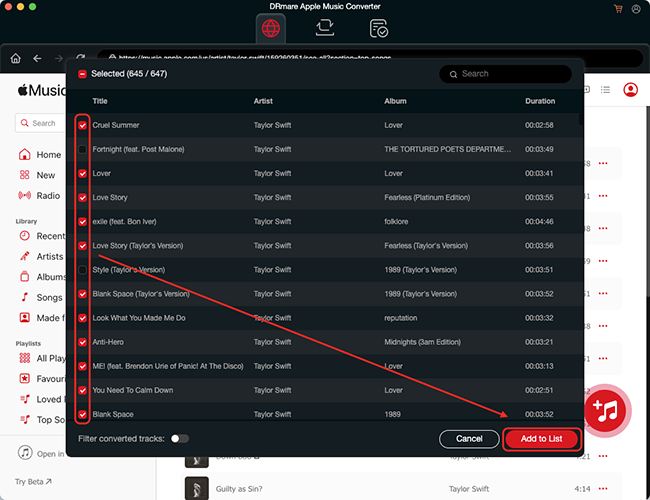
- Open DRmare Apple Music Converter on your computer. The main screen features an integrated Apple Music Web Player, completely eliminating the need to use the iTunes or Apple Music desktop apps. Find and open the item, click the red '+' button, and hit the 'Add to List' button to load the tracks into your conversion queue.
- Step 2Change Apple Music output parameters for Premiere Pro
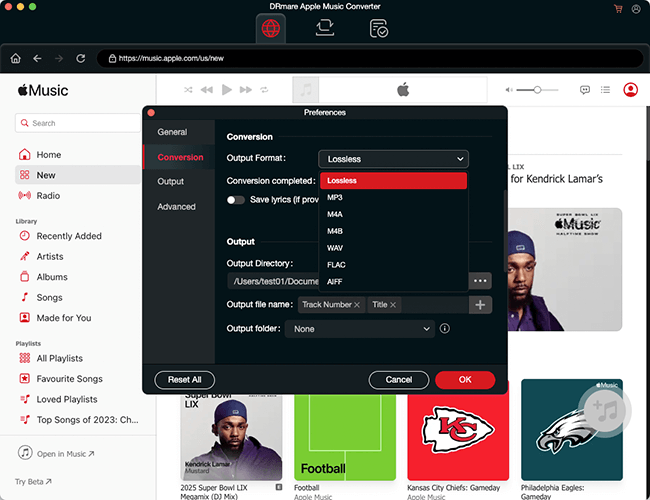
- Please hit on the 'Menu' > 'Preferences' option. Then a new window will pop up, in which you can set the output audio format for Apple Music files. In addition, you can adjust other audio parameters of Apple Music tracks as you like. To make Apple Music Premiere Pro work, you can reset the format to MP3, AIFF, M4A, or WAV. The most standard formats are MP3 and WAV. Then click on 'OK'.
- Step 3Convert Apple Music to unprotected files for Premiere Pro
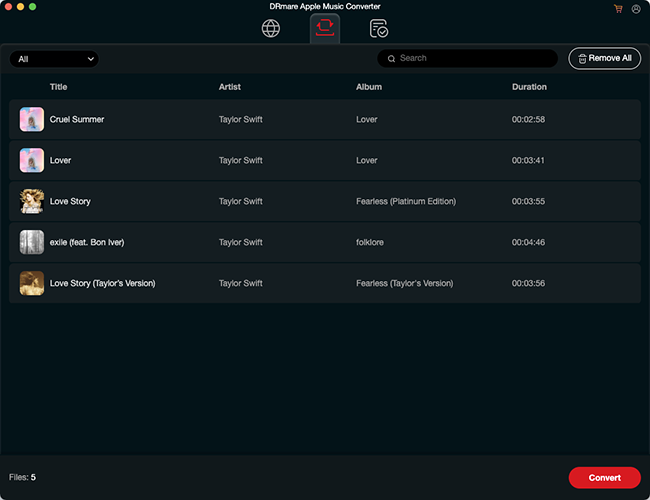
- Now you can start to convert Apple Music tracks by clicking the big 'Convert' button. Then DRmare program will work for you at a 30X speed. After a while, the Apple Music files will be converted as popular audio files and saved to your computer. You could press the 'Output' button and it will guide you to the target folder. Now you have got the compatible Apple audio files for Premiere Pro.
- Step 4How to Add Apple Music to Adobe Premiere Pro
-
- Open Adobe Premiere Pro on your computer. Open your project or create a new one in Premiere Pro.
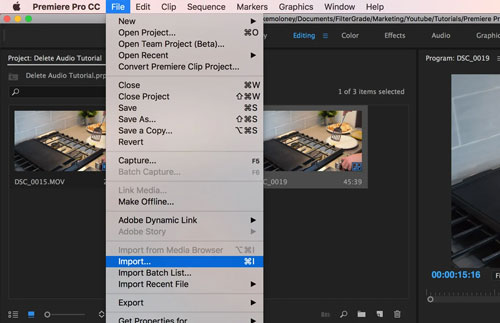
- Then Hit the 'File' menu > 'Import' option to select your converted Apple Music files and click on 'Open' to import Apple Music into Premiere Pro. (Alternatively, you can drag and drop the music files to your project panel directly.)
- Once added, you can easily use Apple Music as the background music for your Premiere projects.
Part 3. How to Add iTunes Music to Adobe Premiere Pro
Nowadays, all songs offered by the iTunes Store come without protection. These DRM-free songs, called iTunes Plus, have no usage restrictions and feature high-quality, 256 kbps AAC (Advanced Audio Coding) encoding. By following these steps, you can add music from iTunes to Premiere Pro to seamlessly integrate them into your edits.
How to Import Music from iTunes to Premiere Pro
Step 1. Launch Adobe Premiere Pro on your computer, create a new project or open an existing one where you want to add the iTunes music.
Step 2. In the Project panel, right-click in the empty space and select "Import" to import the purchased iTunes music file.
Step 3. Once imported, you can now drag and drop the iTunes music file from the Project panel onto the timeline or any other desired location in your project.
Step 4. Adjust the duration and position of the music file on the timeline as needed.
Step 5. Continue editing your project, adding other elements, effects, or transitions as desired.
Part 4. How to Use iTunes Music/Apple Music in Premiere Pro
Once you've added Apple Music to your video on Premiere, it's time to edit it to enhance the overall production value of your video. In just a few simple steps below, you can easily make the necessary changes and have your project sounding just the way you want it to.
How to Use Apple Music/iTunes Songs in Premiere Pro
Step 1. Choose the 'Window' > 'Project' option and the added Apple Music file will be selected.
Step 2. Double-click the imported Apple Music file to open it in the 'Source' panel.
Step 3. Drag the Apple Music audio clip to the sequence in the 'Timeline' panel.
Step 4. Adjust the volume of the Apple track by selecting the audio clip and using the "Audio Gain" option in the "Effect Controls" panel. You can also apply audio effects, like reverb, echo, and equalization to enhance the sound quality.
Step 5. Fade the music in and out by adding audio transitions between the clips.
Step 6. Use the "Auto Ducking" feature to automatically lower the volume of the Apple song when someone is speaking in the video.
Step 7. Use the "Razor" Tool or the "Cut" function to trim and cut the music track to match the length of your video.
Step 8. Use "keyframes" to create fade-ins, fade-outs, and other audio transitions for a smoother integration with your video.
Part 5. In Conclusion
You've learned how to add iTunes songs and Apple Music to Premiere Pro with the best methods. You can import purchased iTunes music into Premiere Pro directly, which is a bit pricey. While with DRmare Apple Music Converter, you can easily convert Apple Music to Premiere Pro-compatible audio files. Then you can add them to Adobe Premiere Pro for video editing as you wish. Now, you can seamlessly integrate your favorite music into your Premiere Pro video projects, enhancing the overall quality and emotional impact.


User Comments
Leave a Comment